I have been making scrub caps for hospital nurses and doctors, and thought that I’d share my pattern. I’ve refined this pattern from these two Youtube videos: DIY Scrub Cap by Lea Goes Green and Scrub Cap by Larissa Fontenot. I have improved on the two above patterns, to:
- adjust the sizing
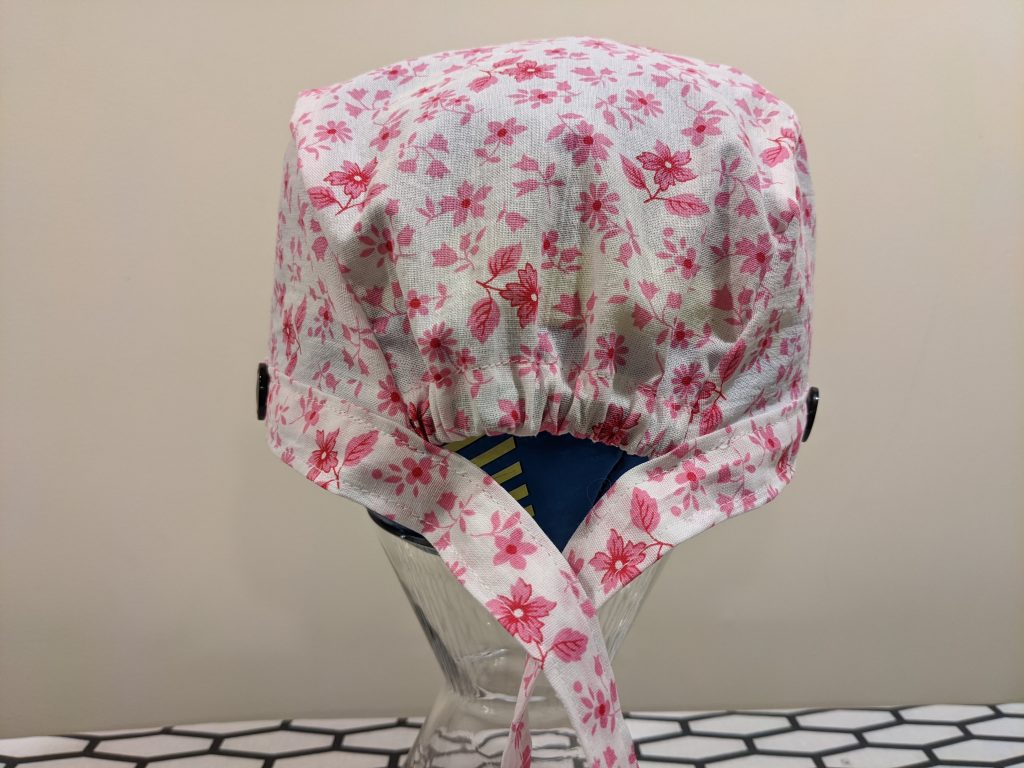
- add a little more bulk in the rear to tuck away long hair
- get rid of the tricky to sew area in the back of the cap side
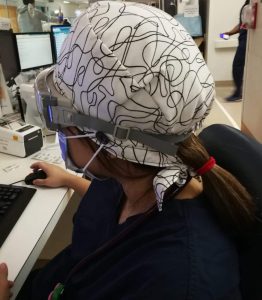
- add two buttons for hooking face mask elastic ear loops
- improve fabric cutting efficiency (by having the tie straps separate from the sides
- allow for optional french seam for a more finished, professional look

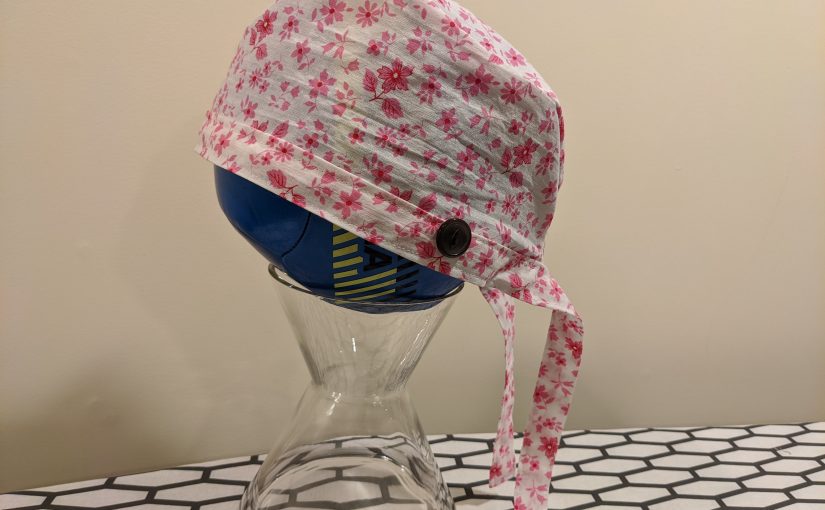
This is a quick design that requires no ribbons and consists of only three details. I prefer this single-layer design to double-layer reversible ones because it is lighter, more breathable, and quicker to make. Finally, the design features two buttons on either side to attach the elastics from a face mask.
I have delivered 20 caps to one of the hospitals, and the feedback I got was very positive. The size fits everyone and the button placement was described as just right. The nurses preferred lighter-weight to medium-weight cotton fabric.


Print out the pattern
Download the PDF file with the pattern and print it on four Letter size pages. Make sure you print without any scaling. Measure the two 10 cm scale reference markers to ensure that the scale was correct. Tape the four pages overlapping by 1-1/2″. Here is how the pages were taped (click on the image to see it bigger):

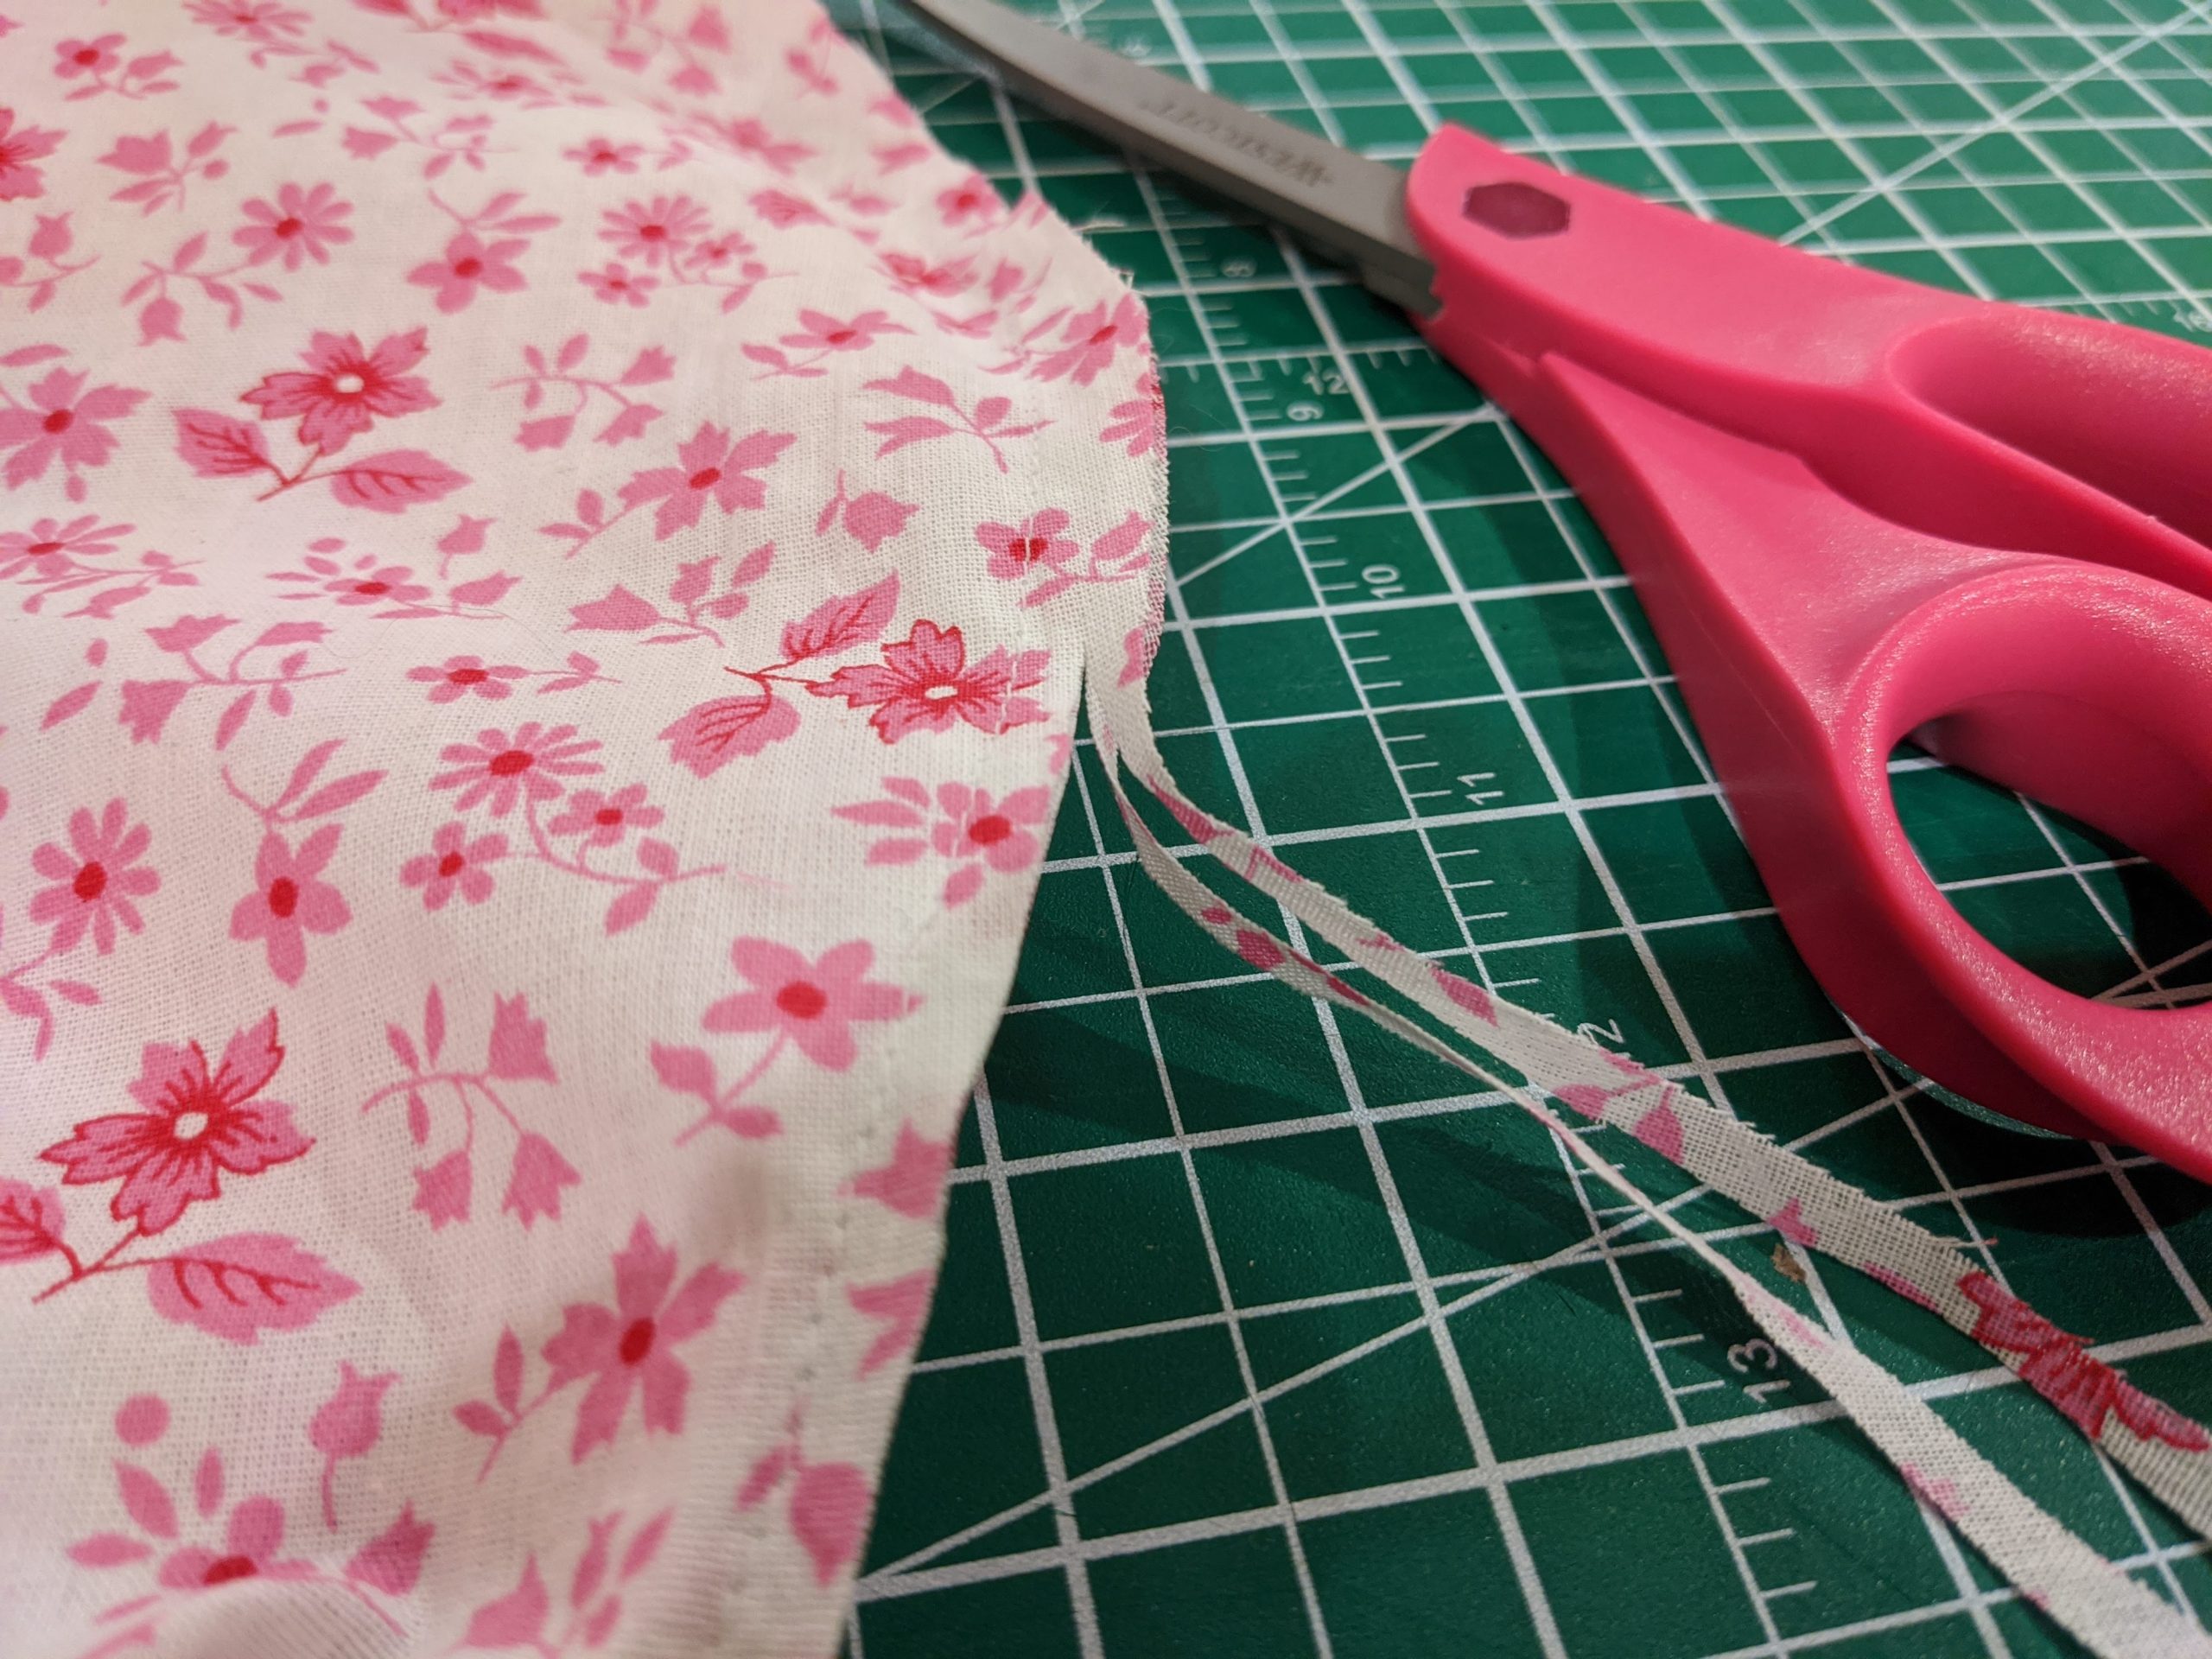
Cut the fabric
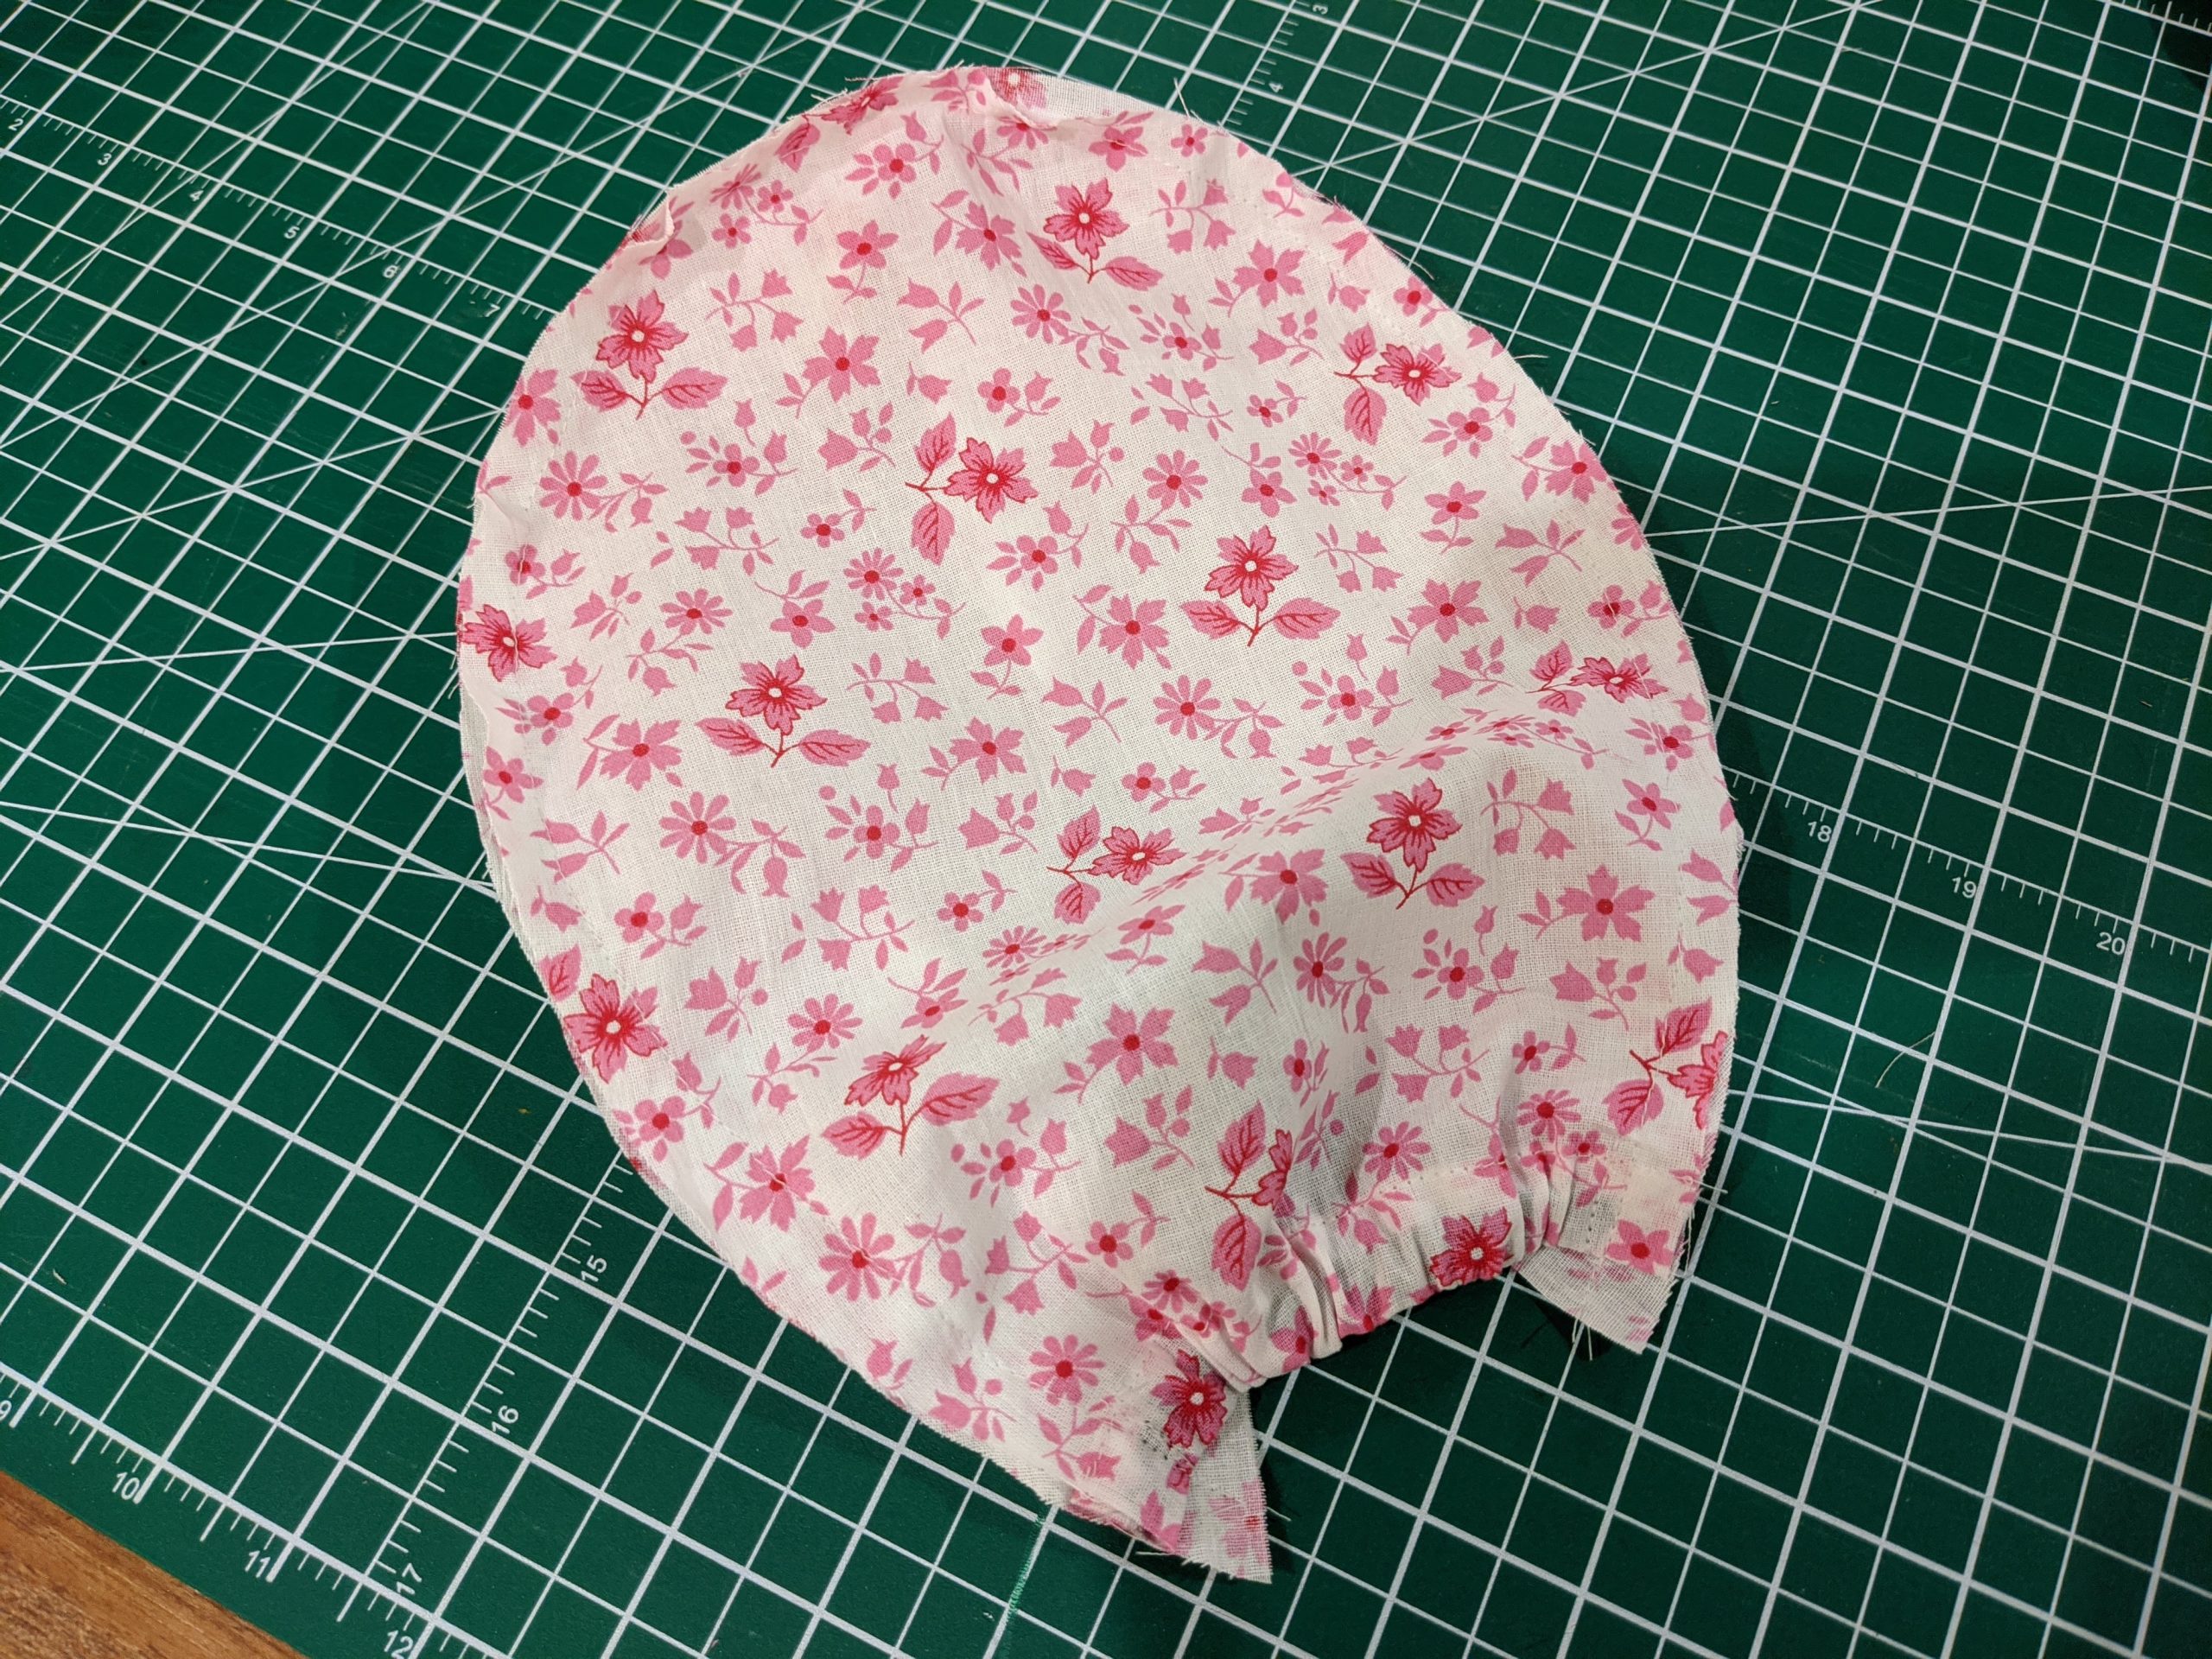
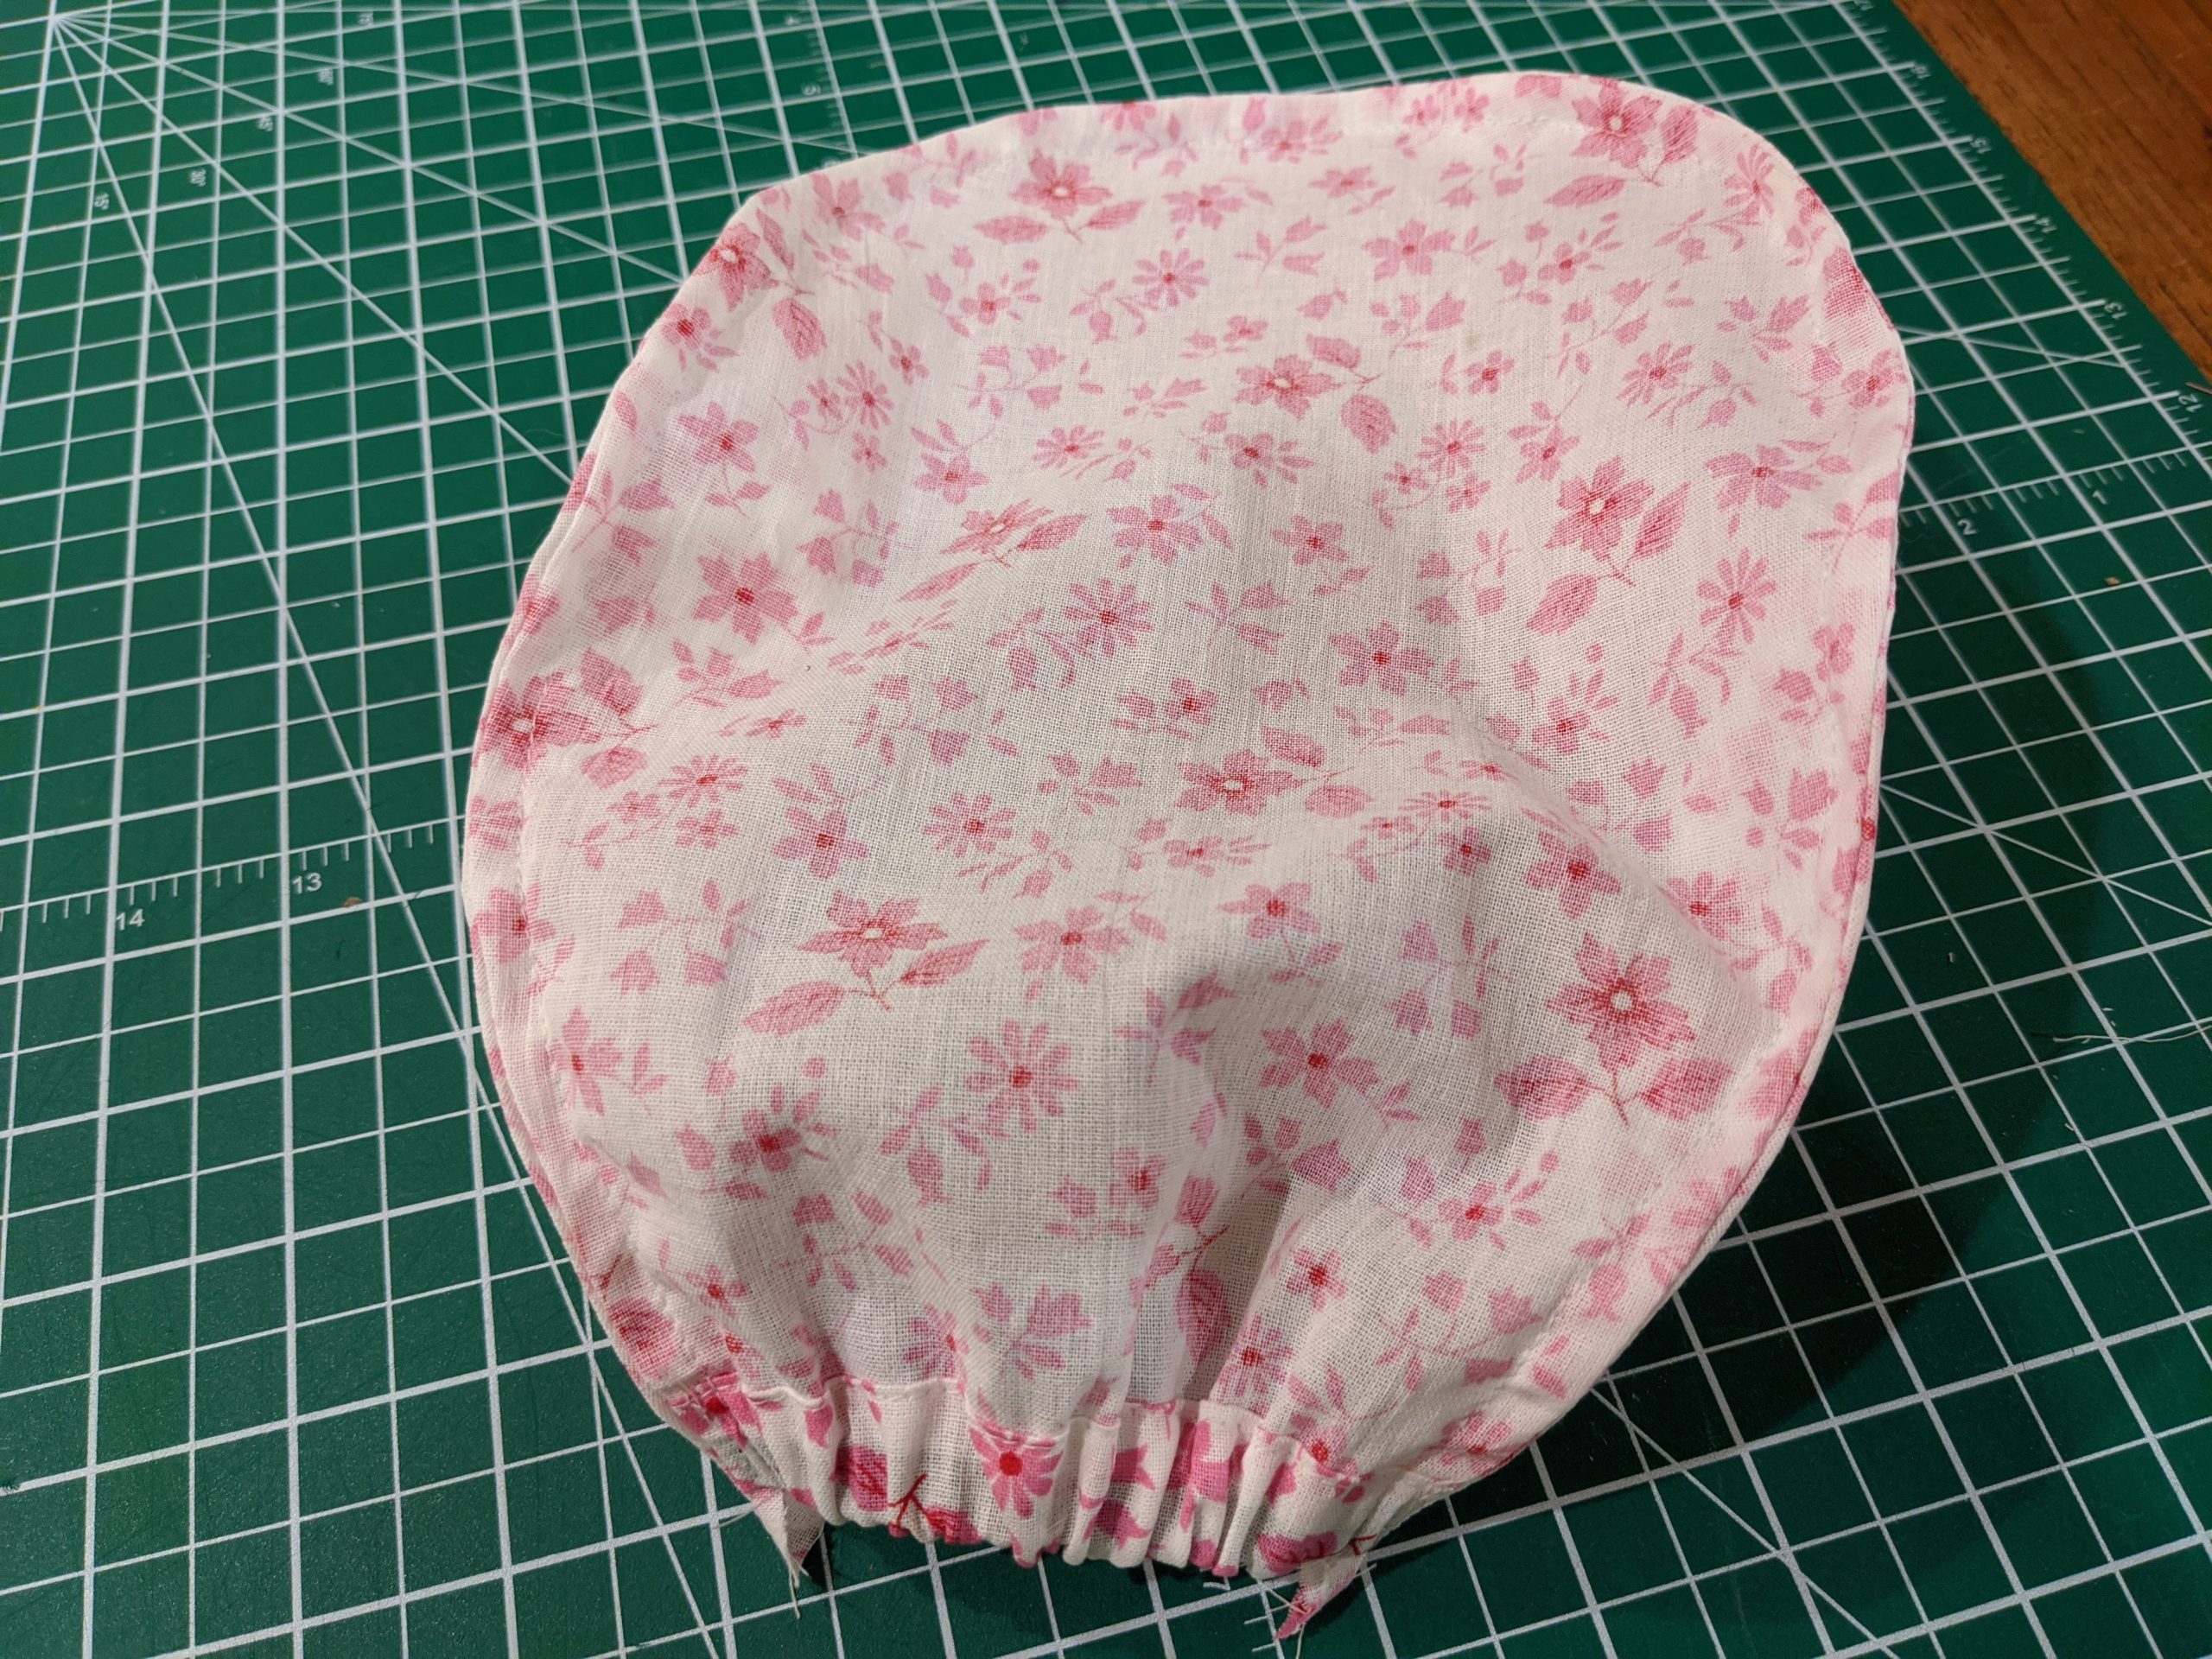
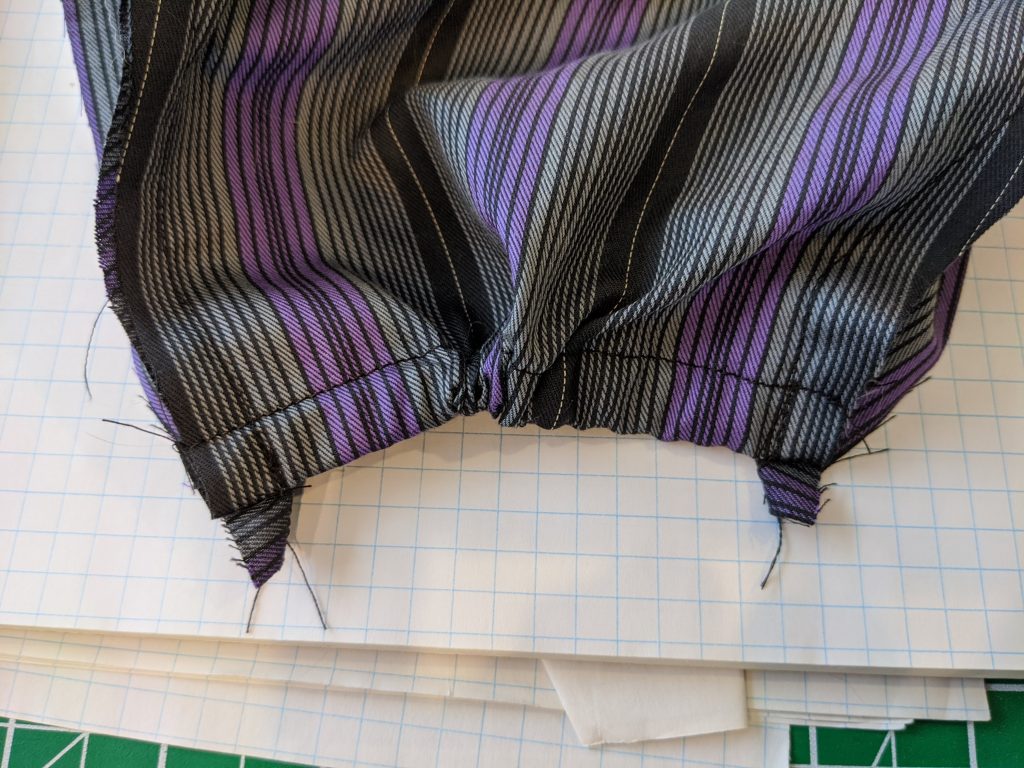
Decide whether you are going to sew a french seam for the seam between the top and the side. French seam adds a nice finished look, but it’s slightly harder to do and takes a little more time. If you have a serger, then you should probably choose the option without French seam. You can definitely use zigzag, but it won’t look quite as finished. Here’s what the two options look like (caps turned inside out):
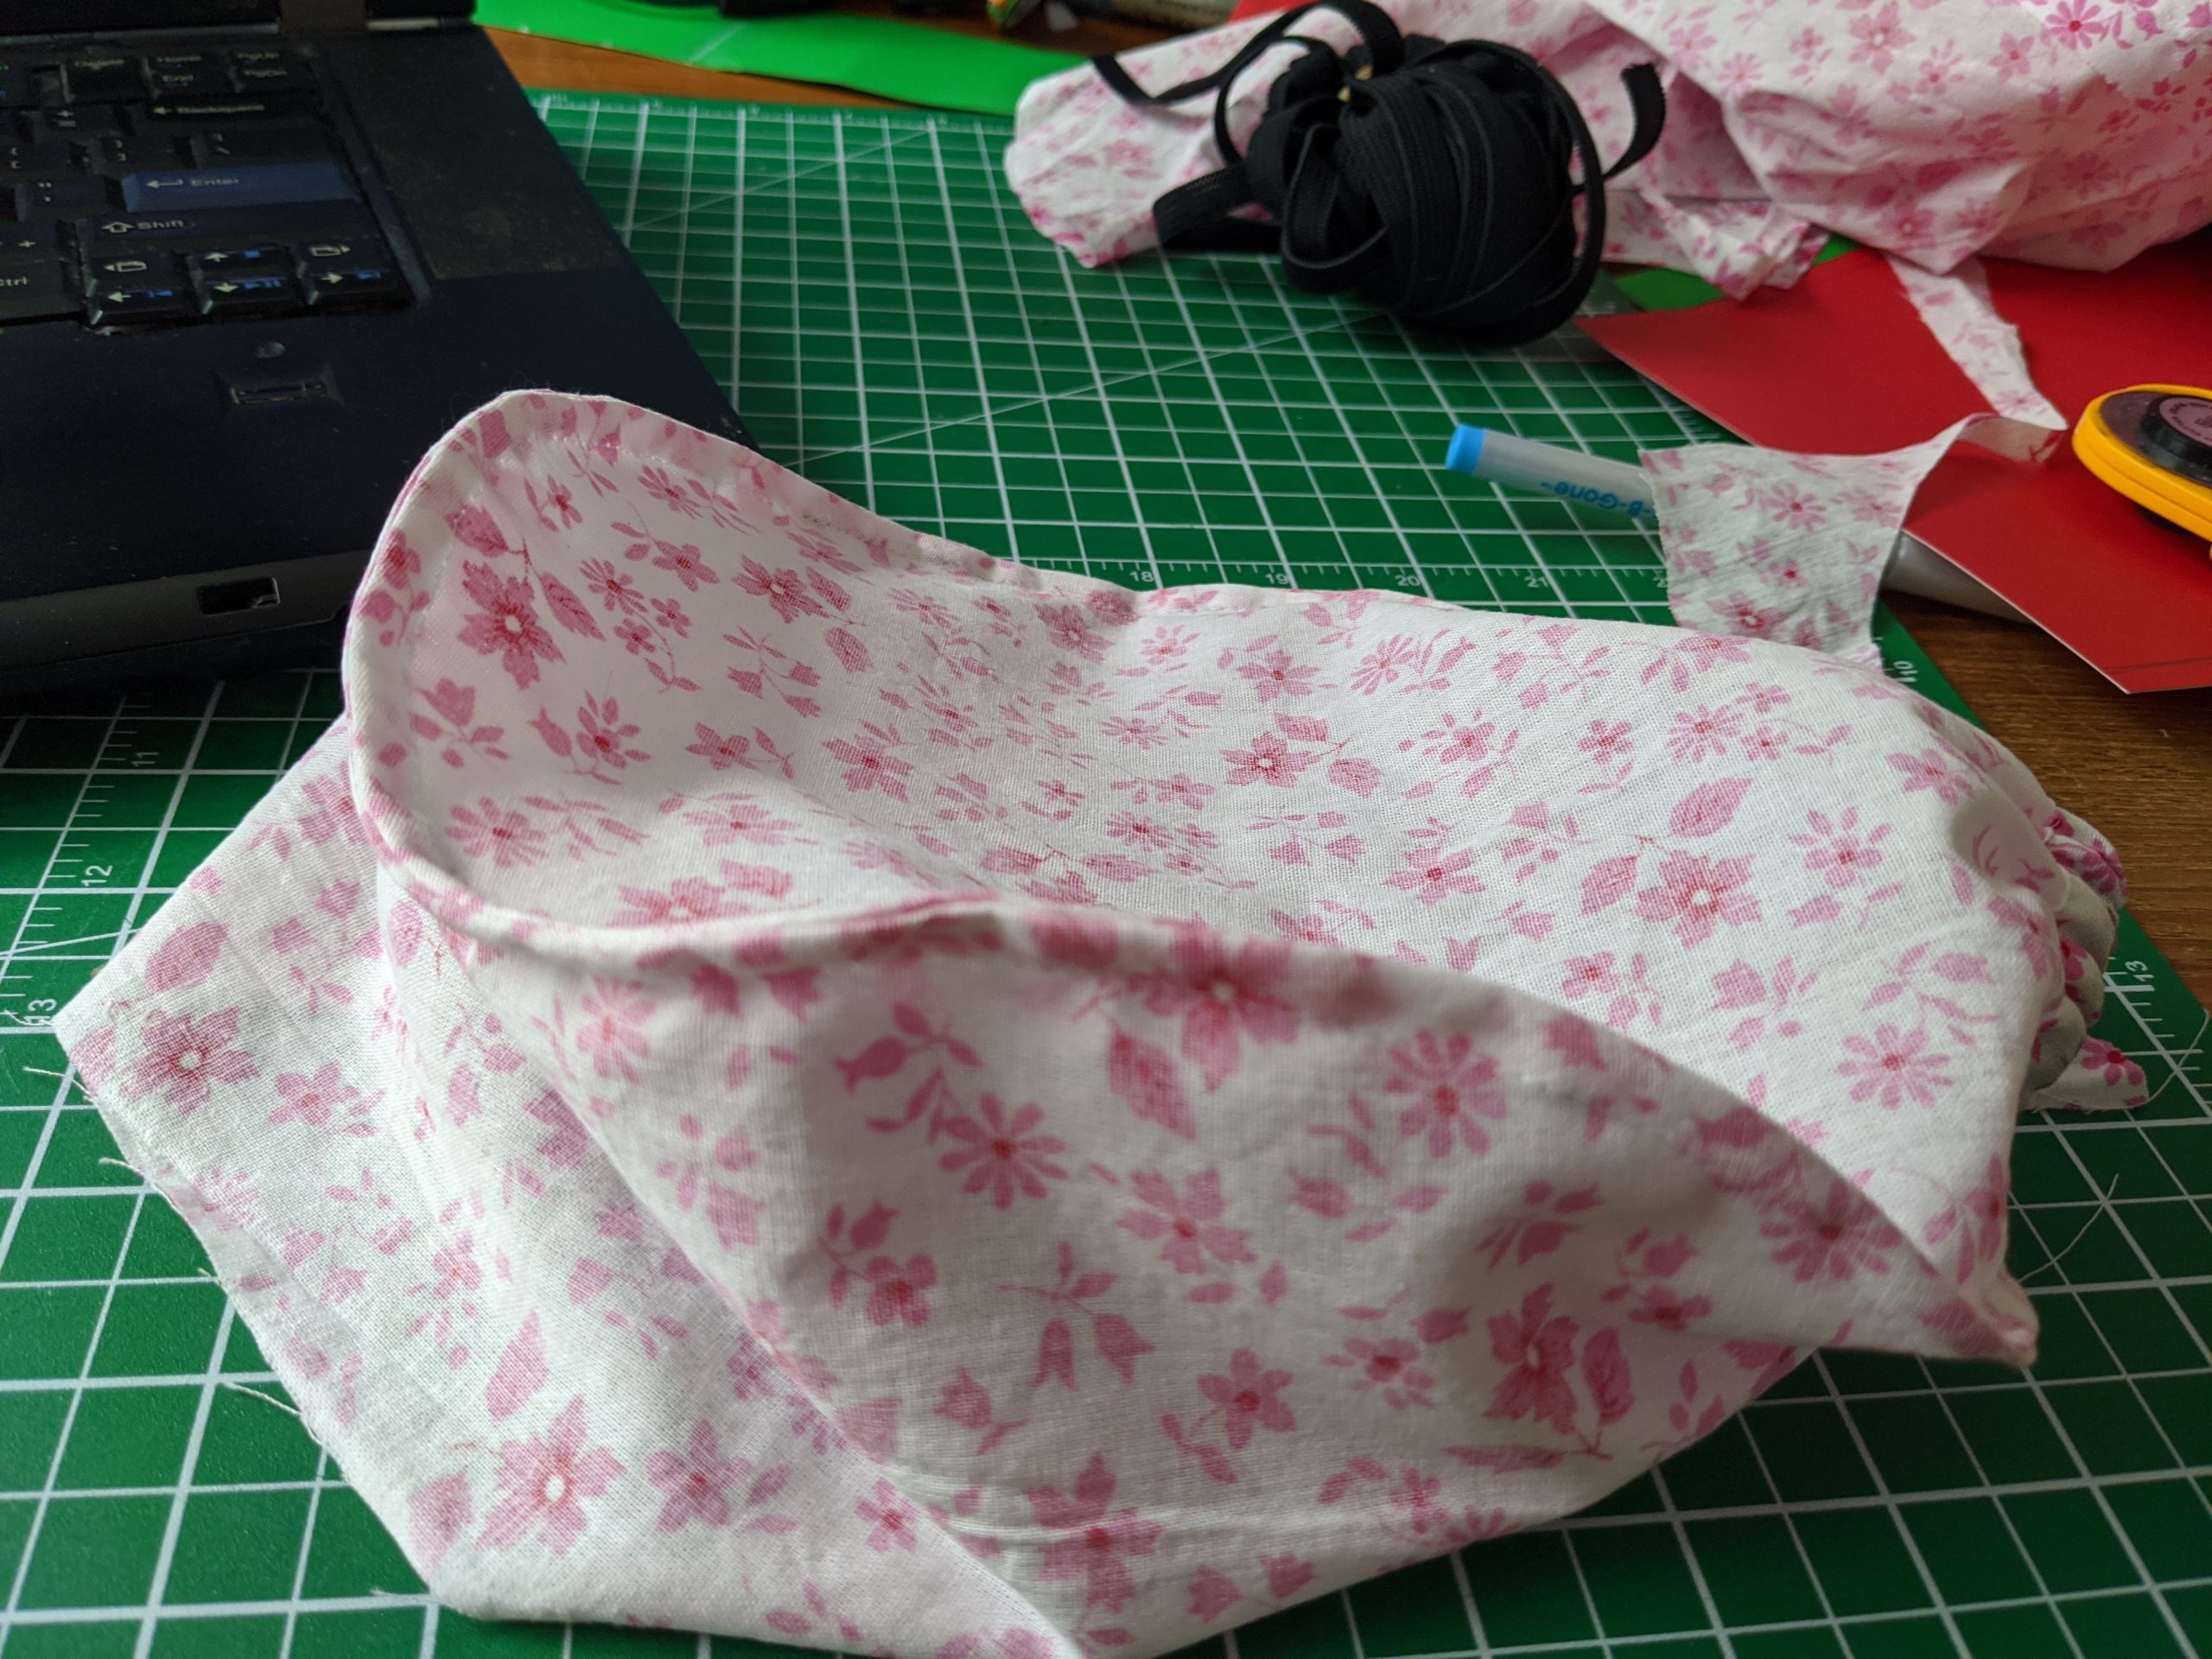
French seam option. 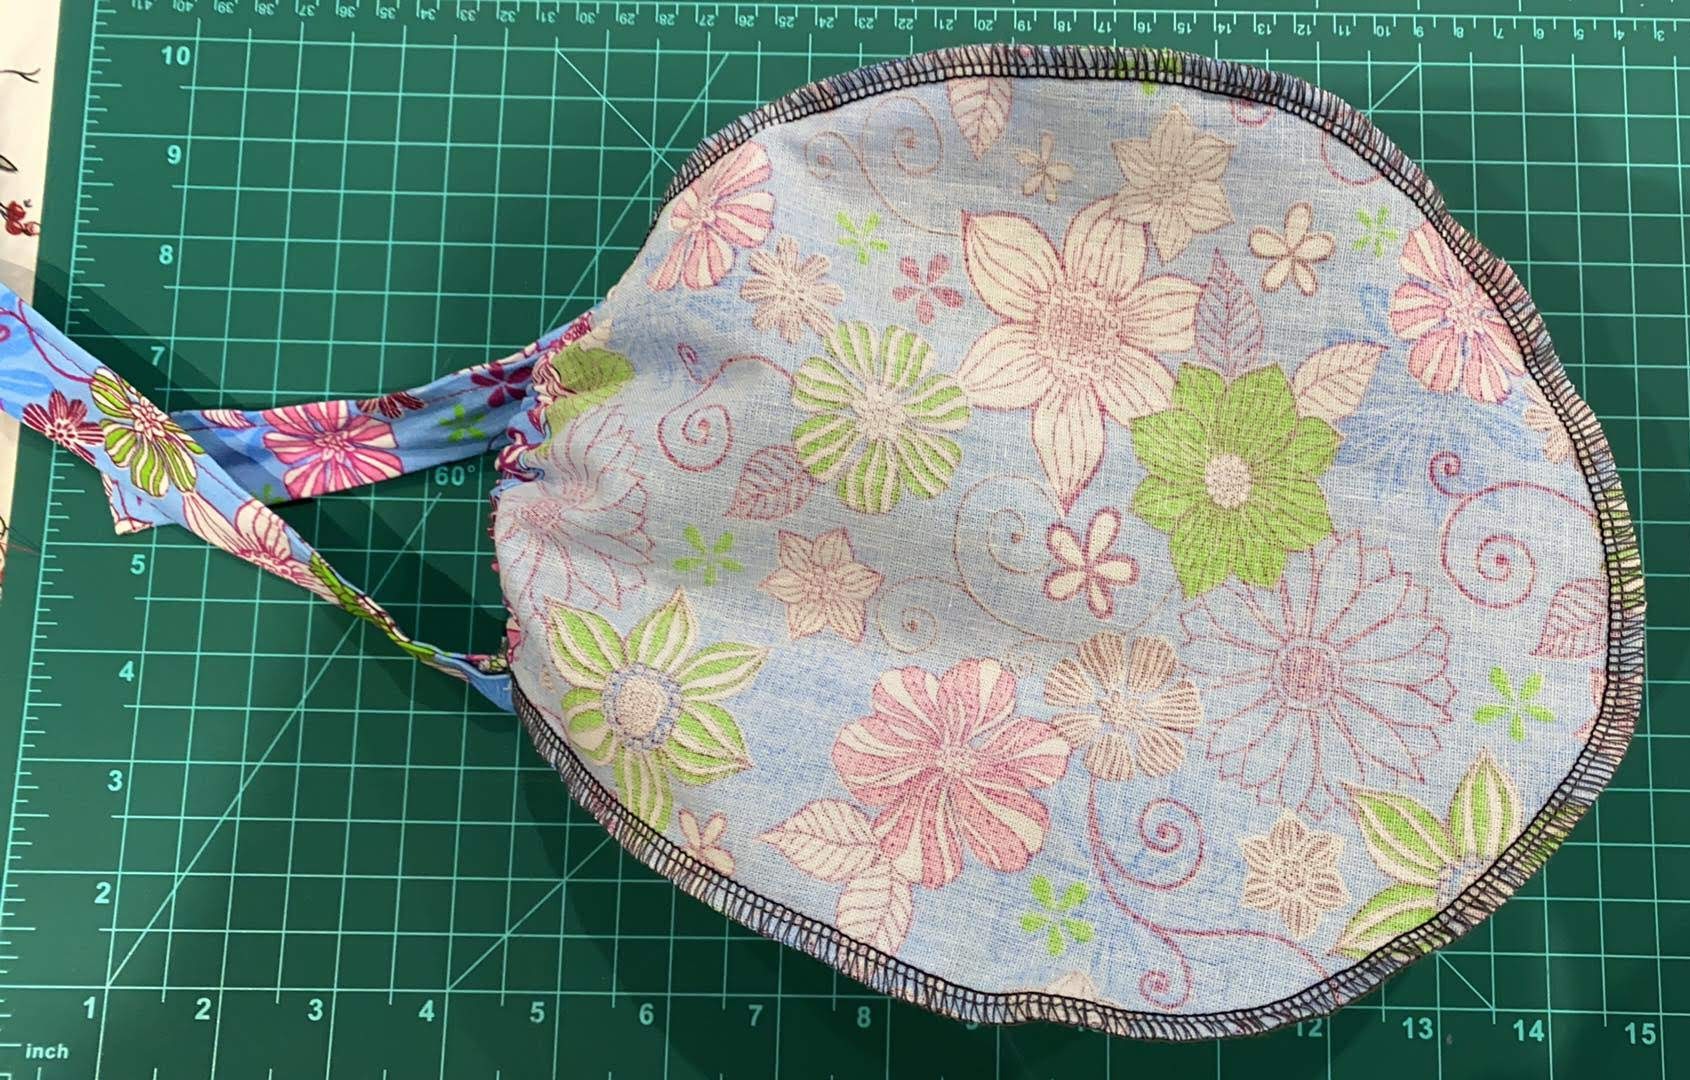
No French seam option, finished with a serger (contributed by Susan Levine-Yalowsky)
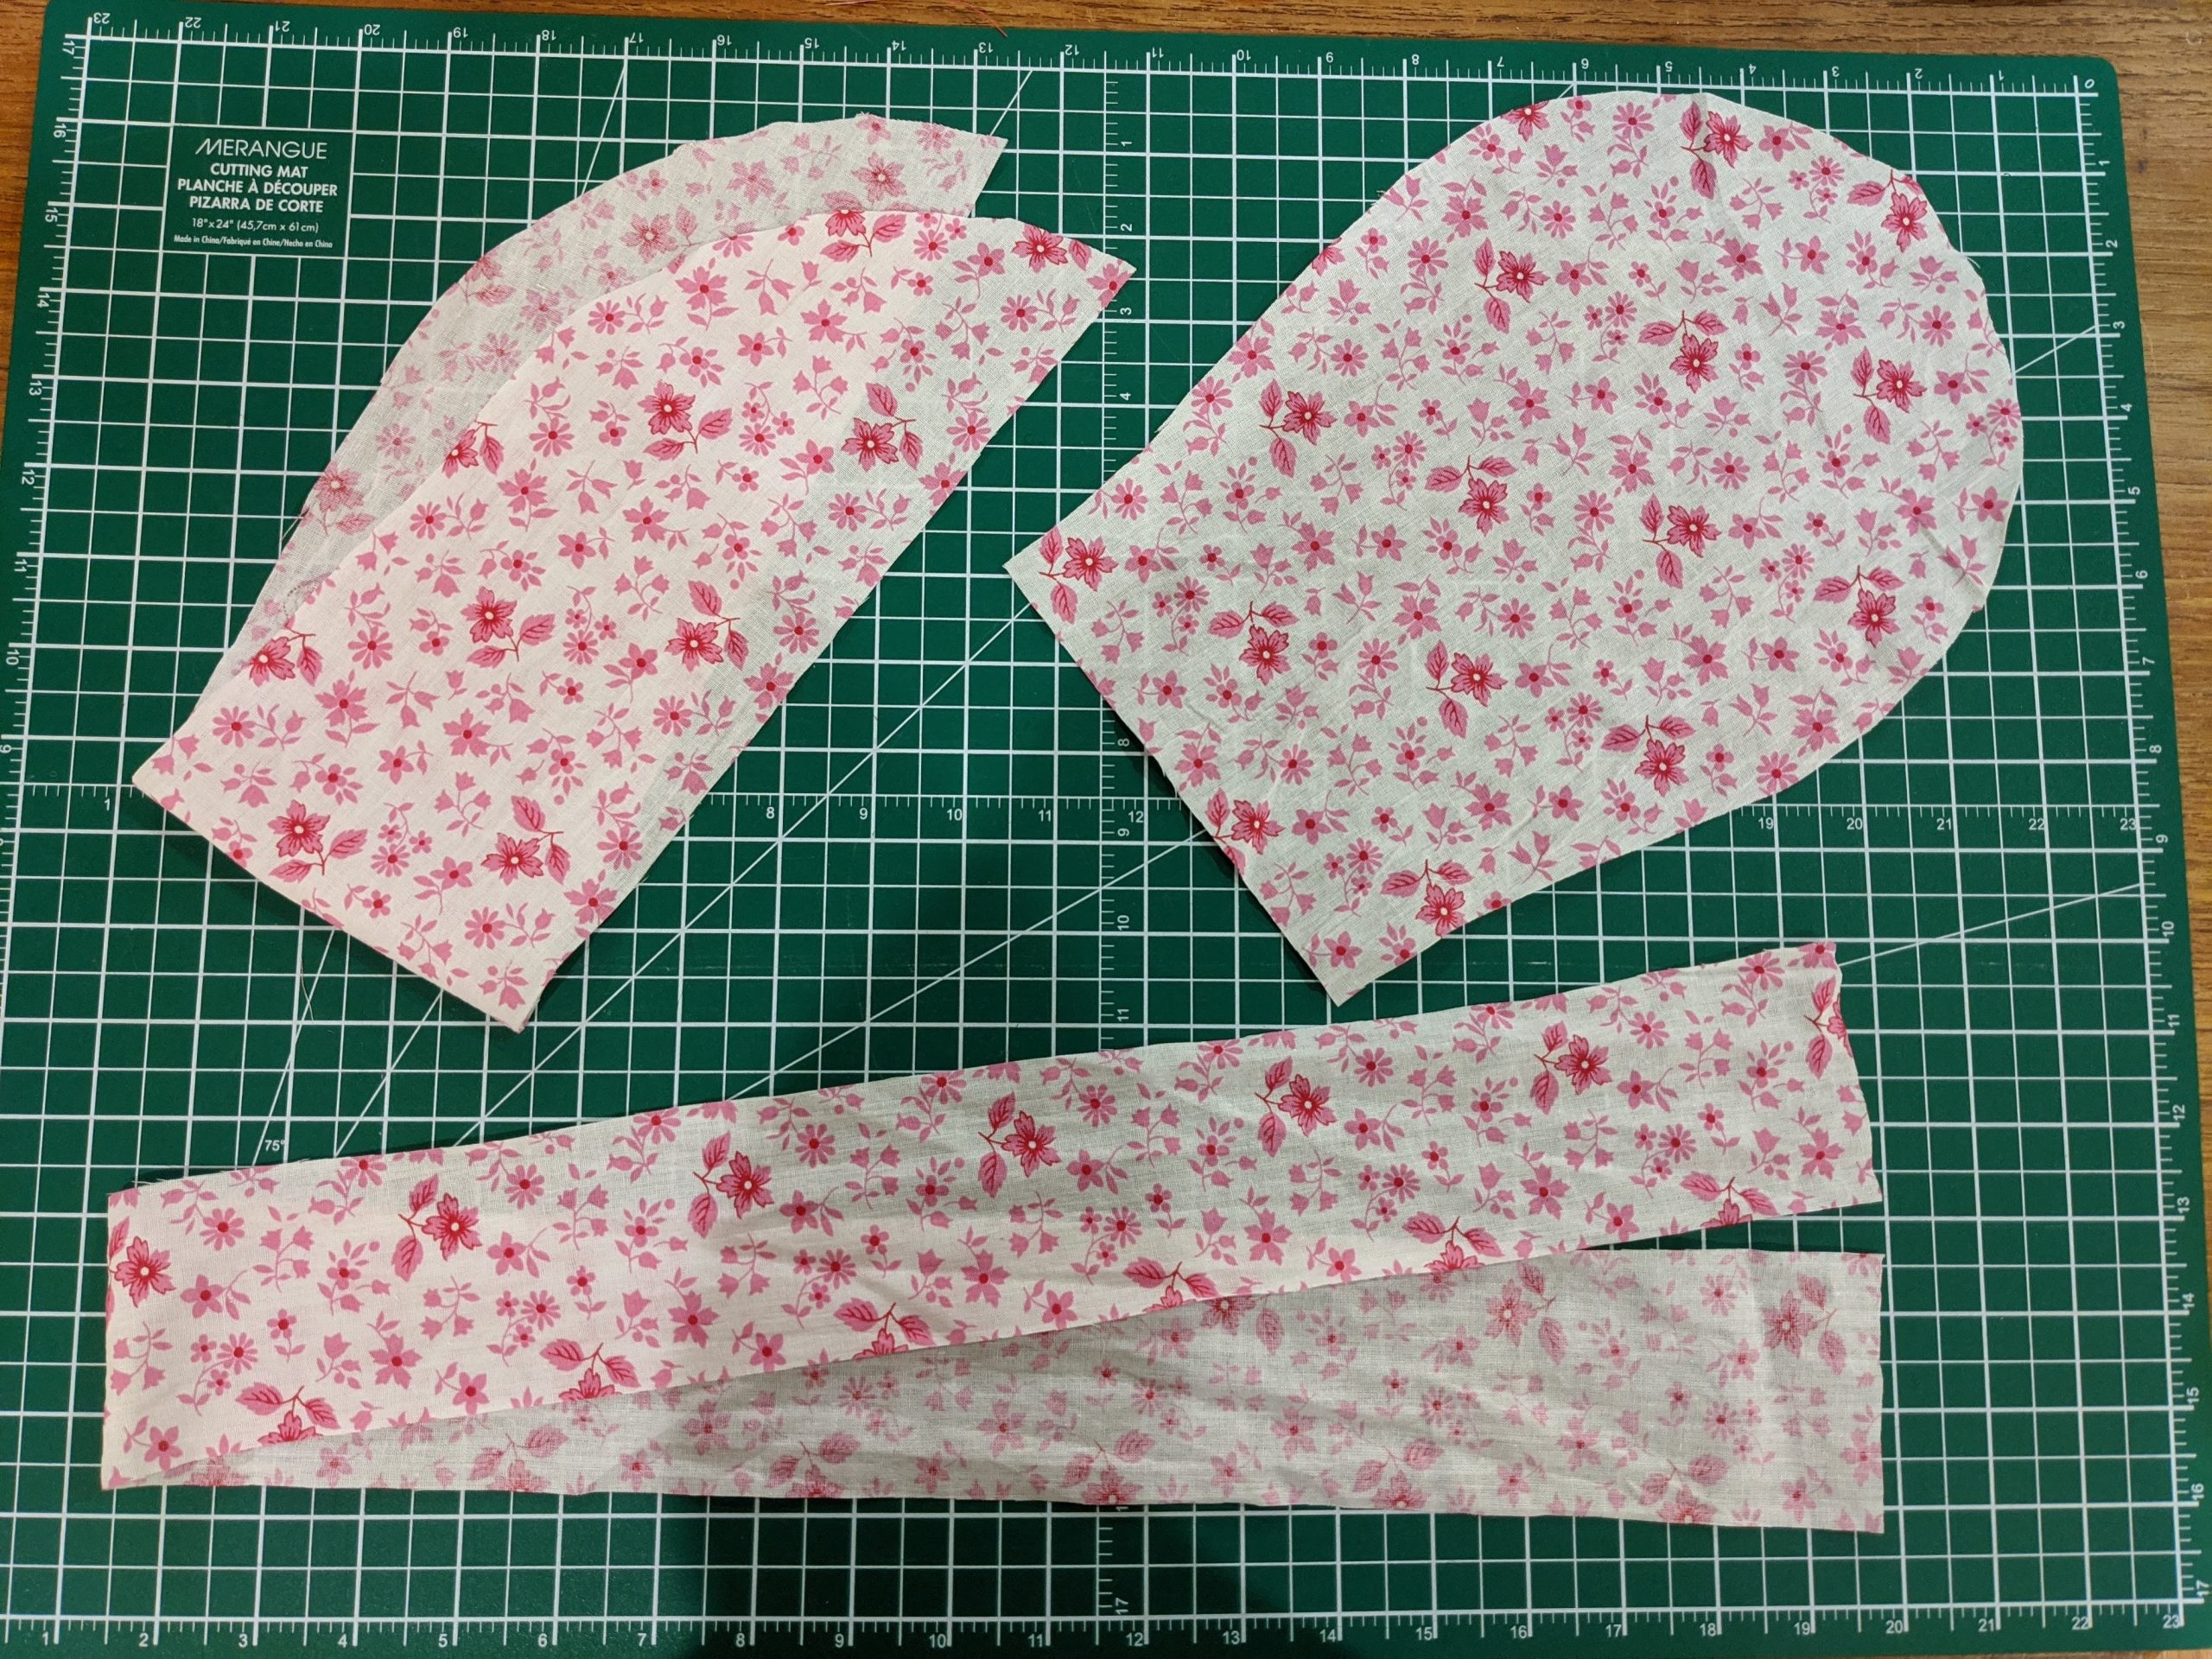
Cut out the three details of the pattern. Cut along the solid lines. Note that the top and the side have two solid lines – outer for pattern with french seam, and the inner for pattern without french seam. Note that the Side and the Strap/Border are cut out over folded fabric, so the resulting detail is twice as large.
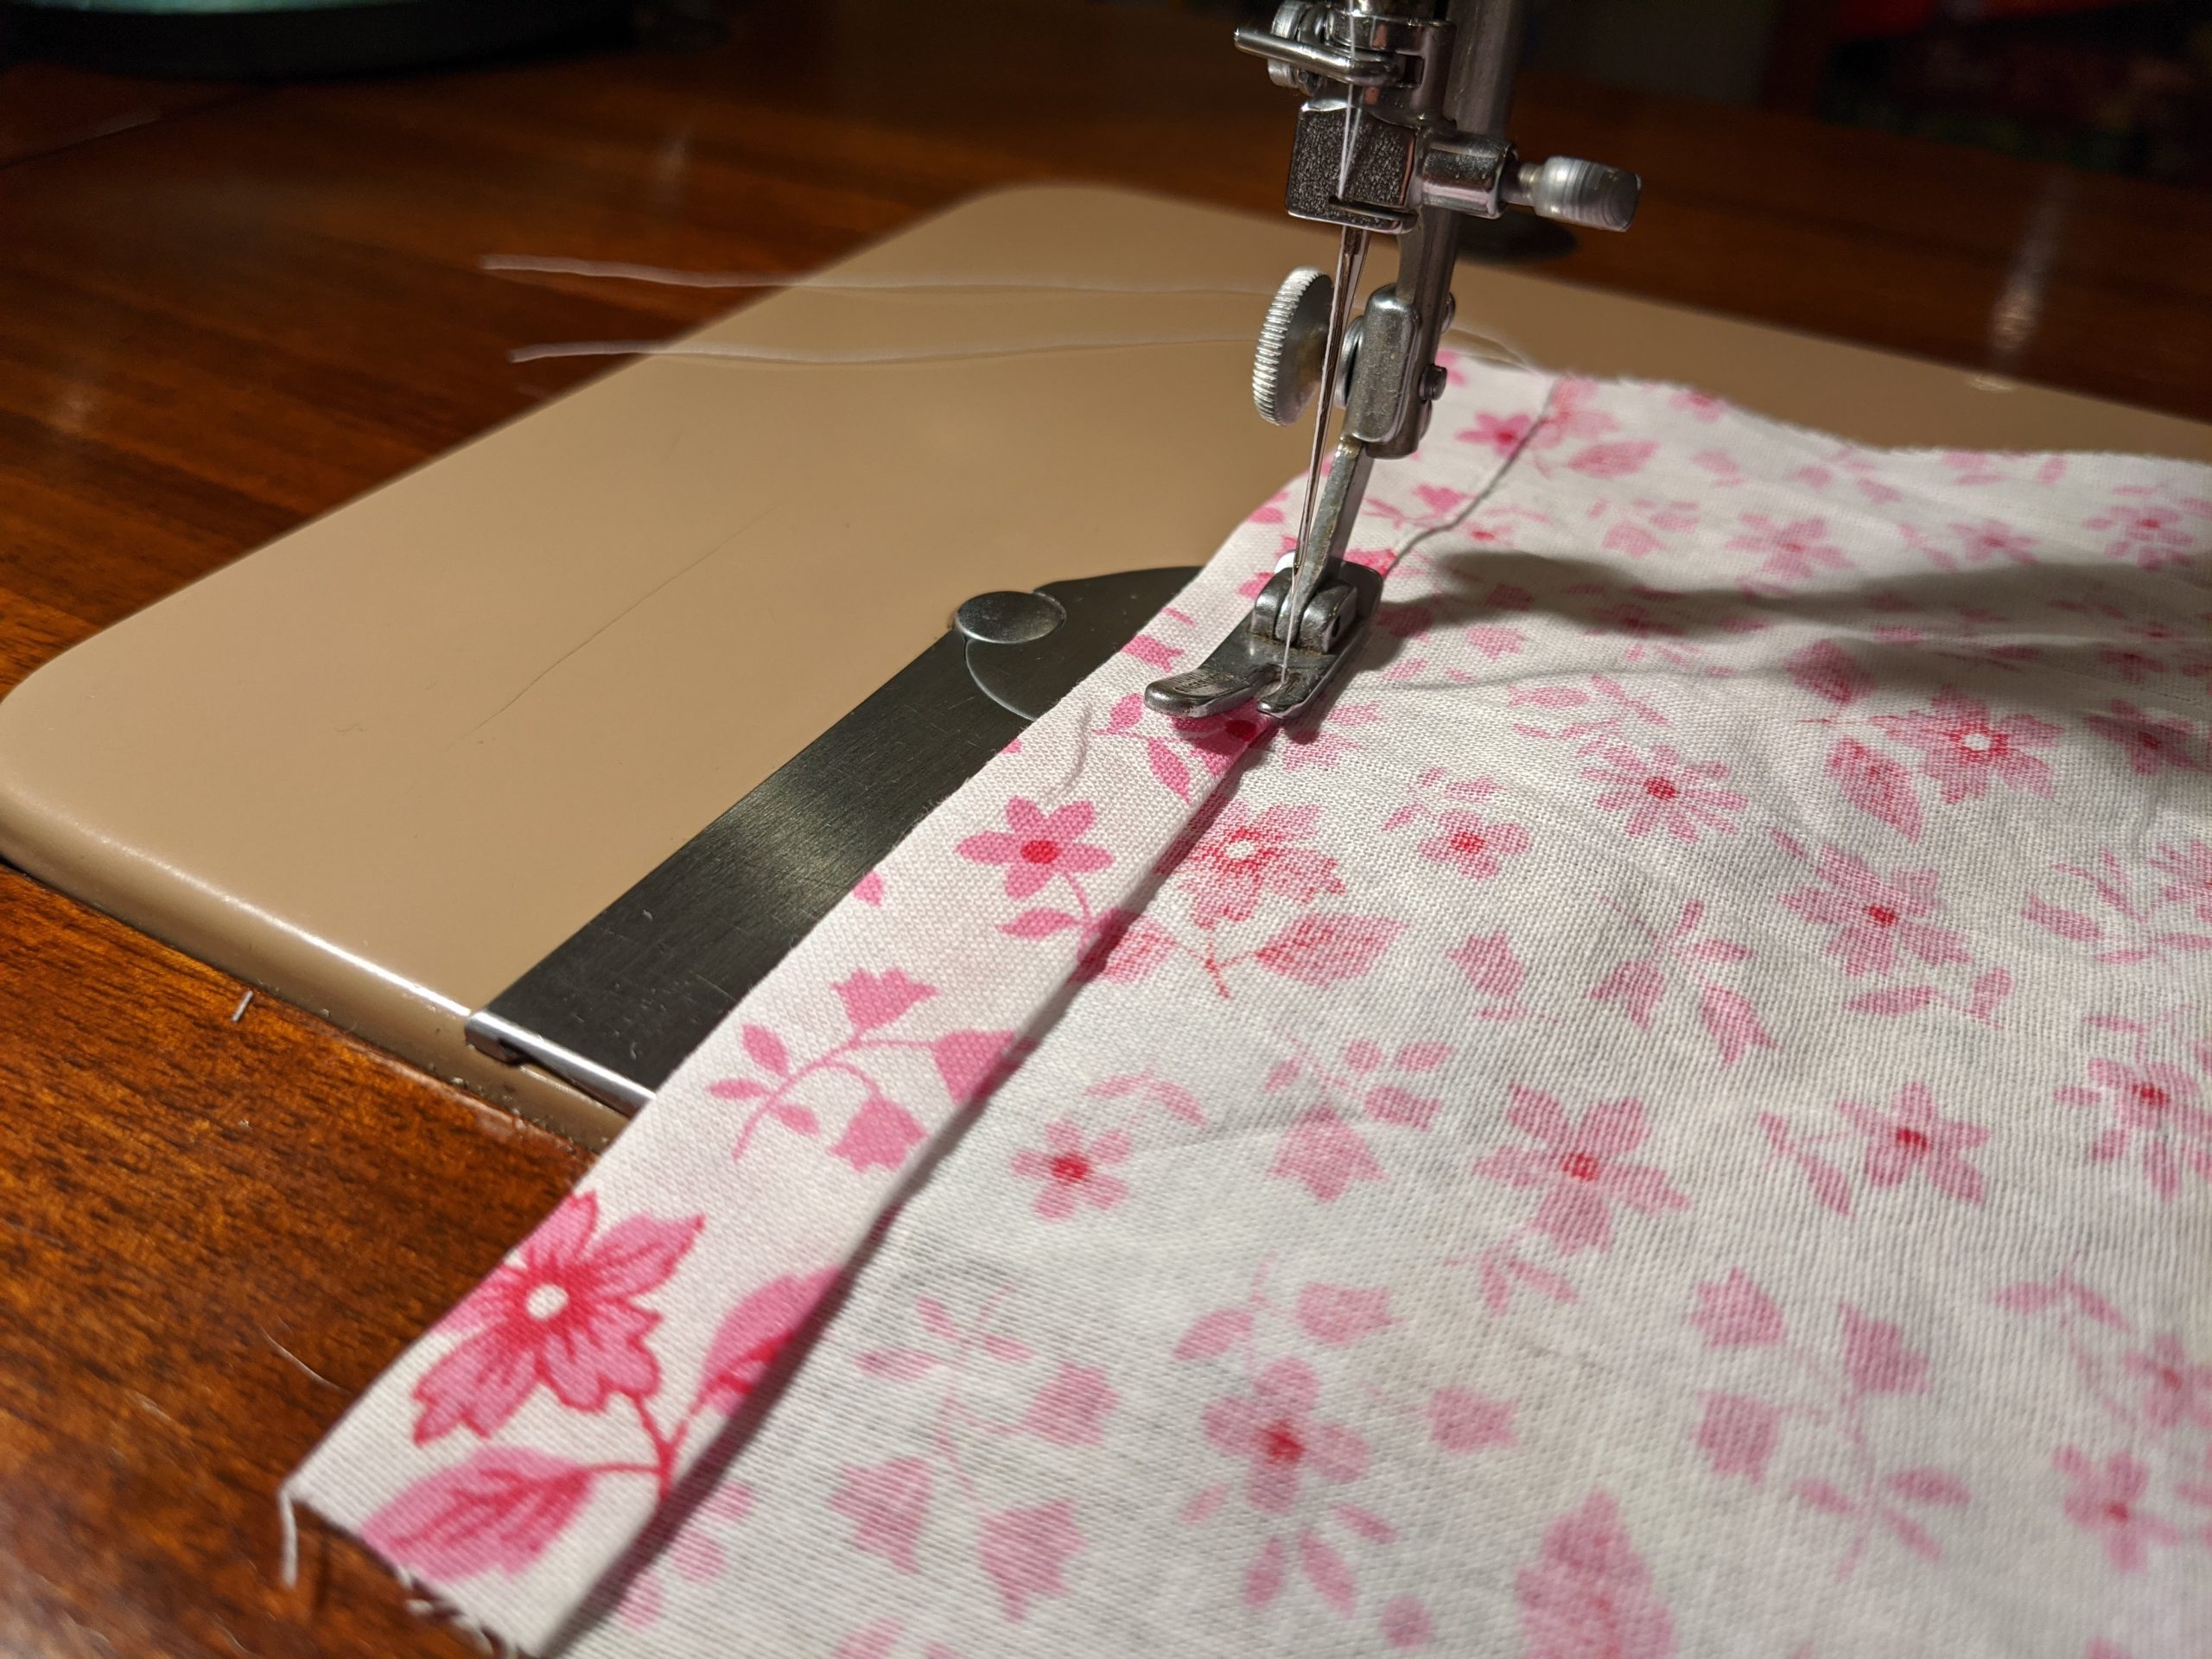
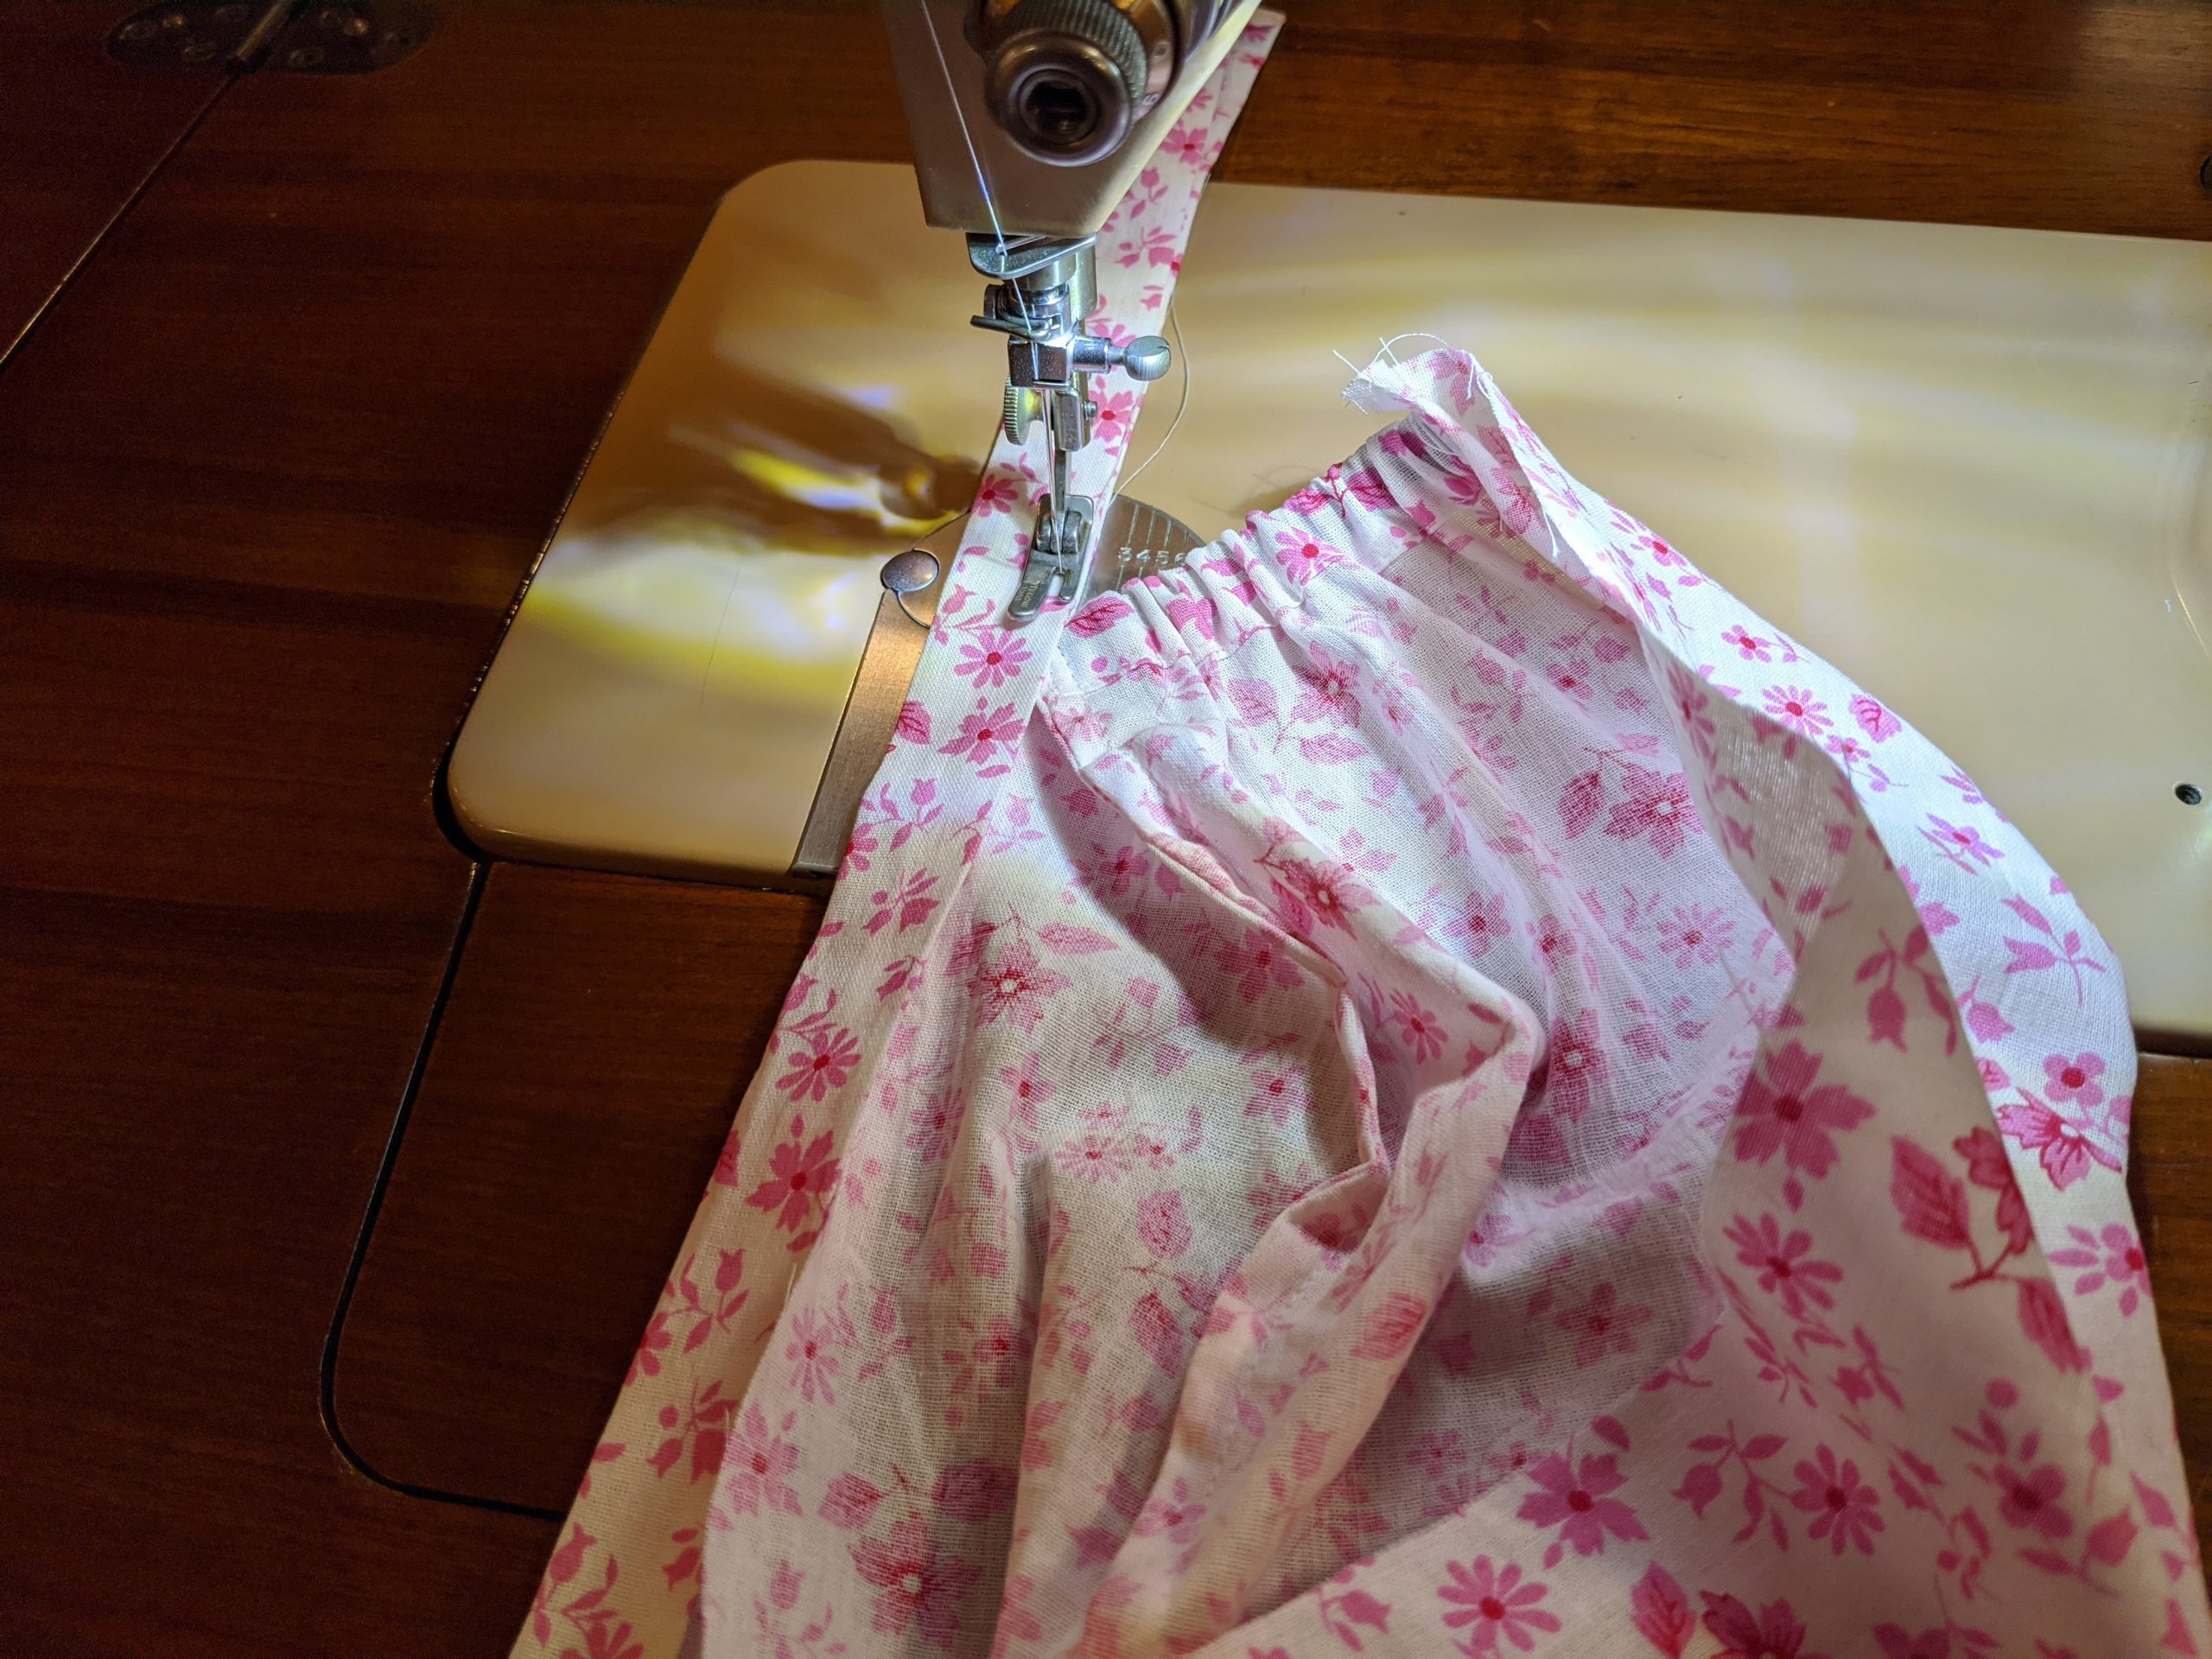
Create casing for elastic
Create casing for elastic in the top by pressing two folds in the bottom of the Top detail, shown as two dotted lines, then sew a straight stitch on the edge of the casing.
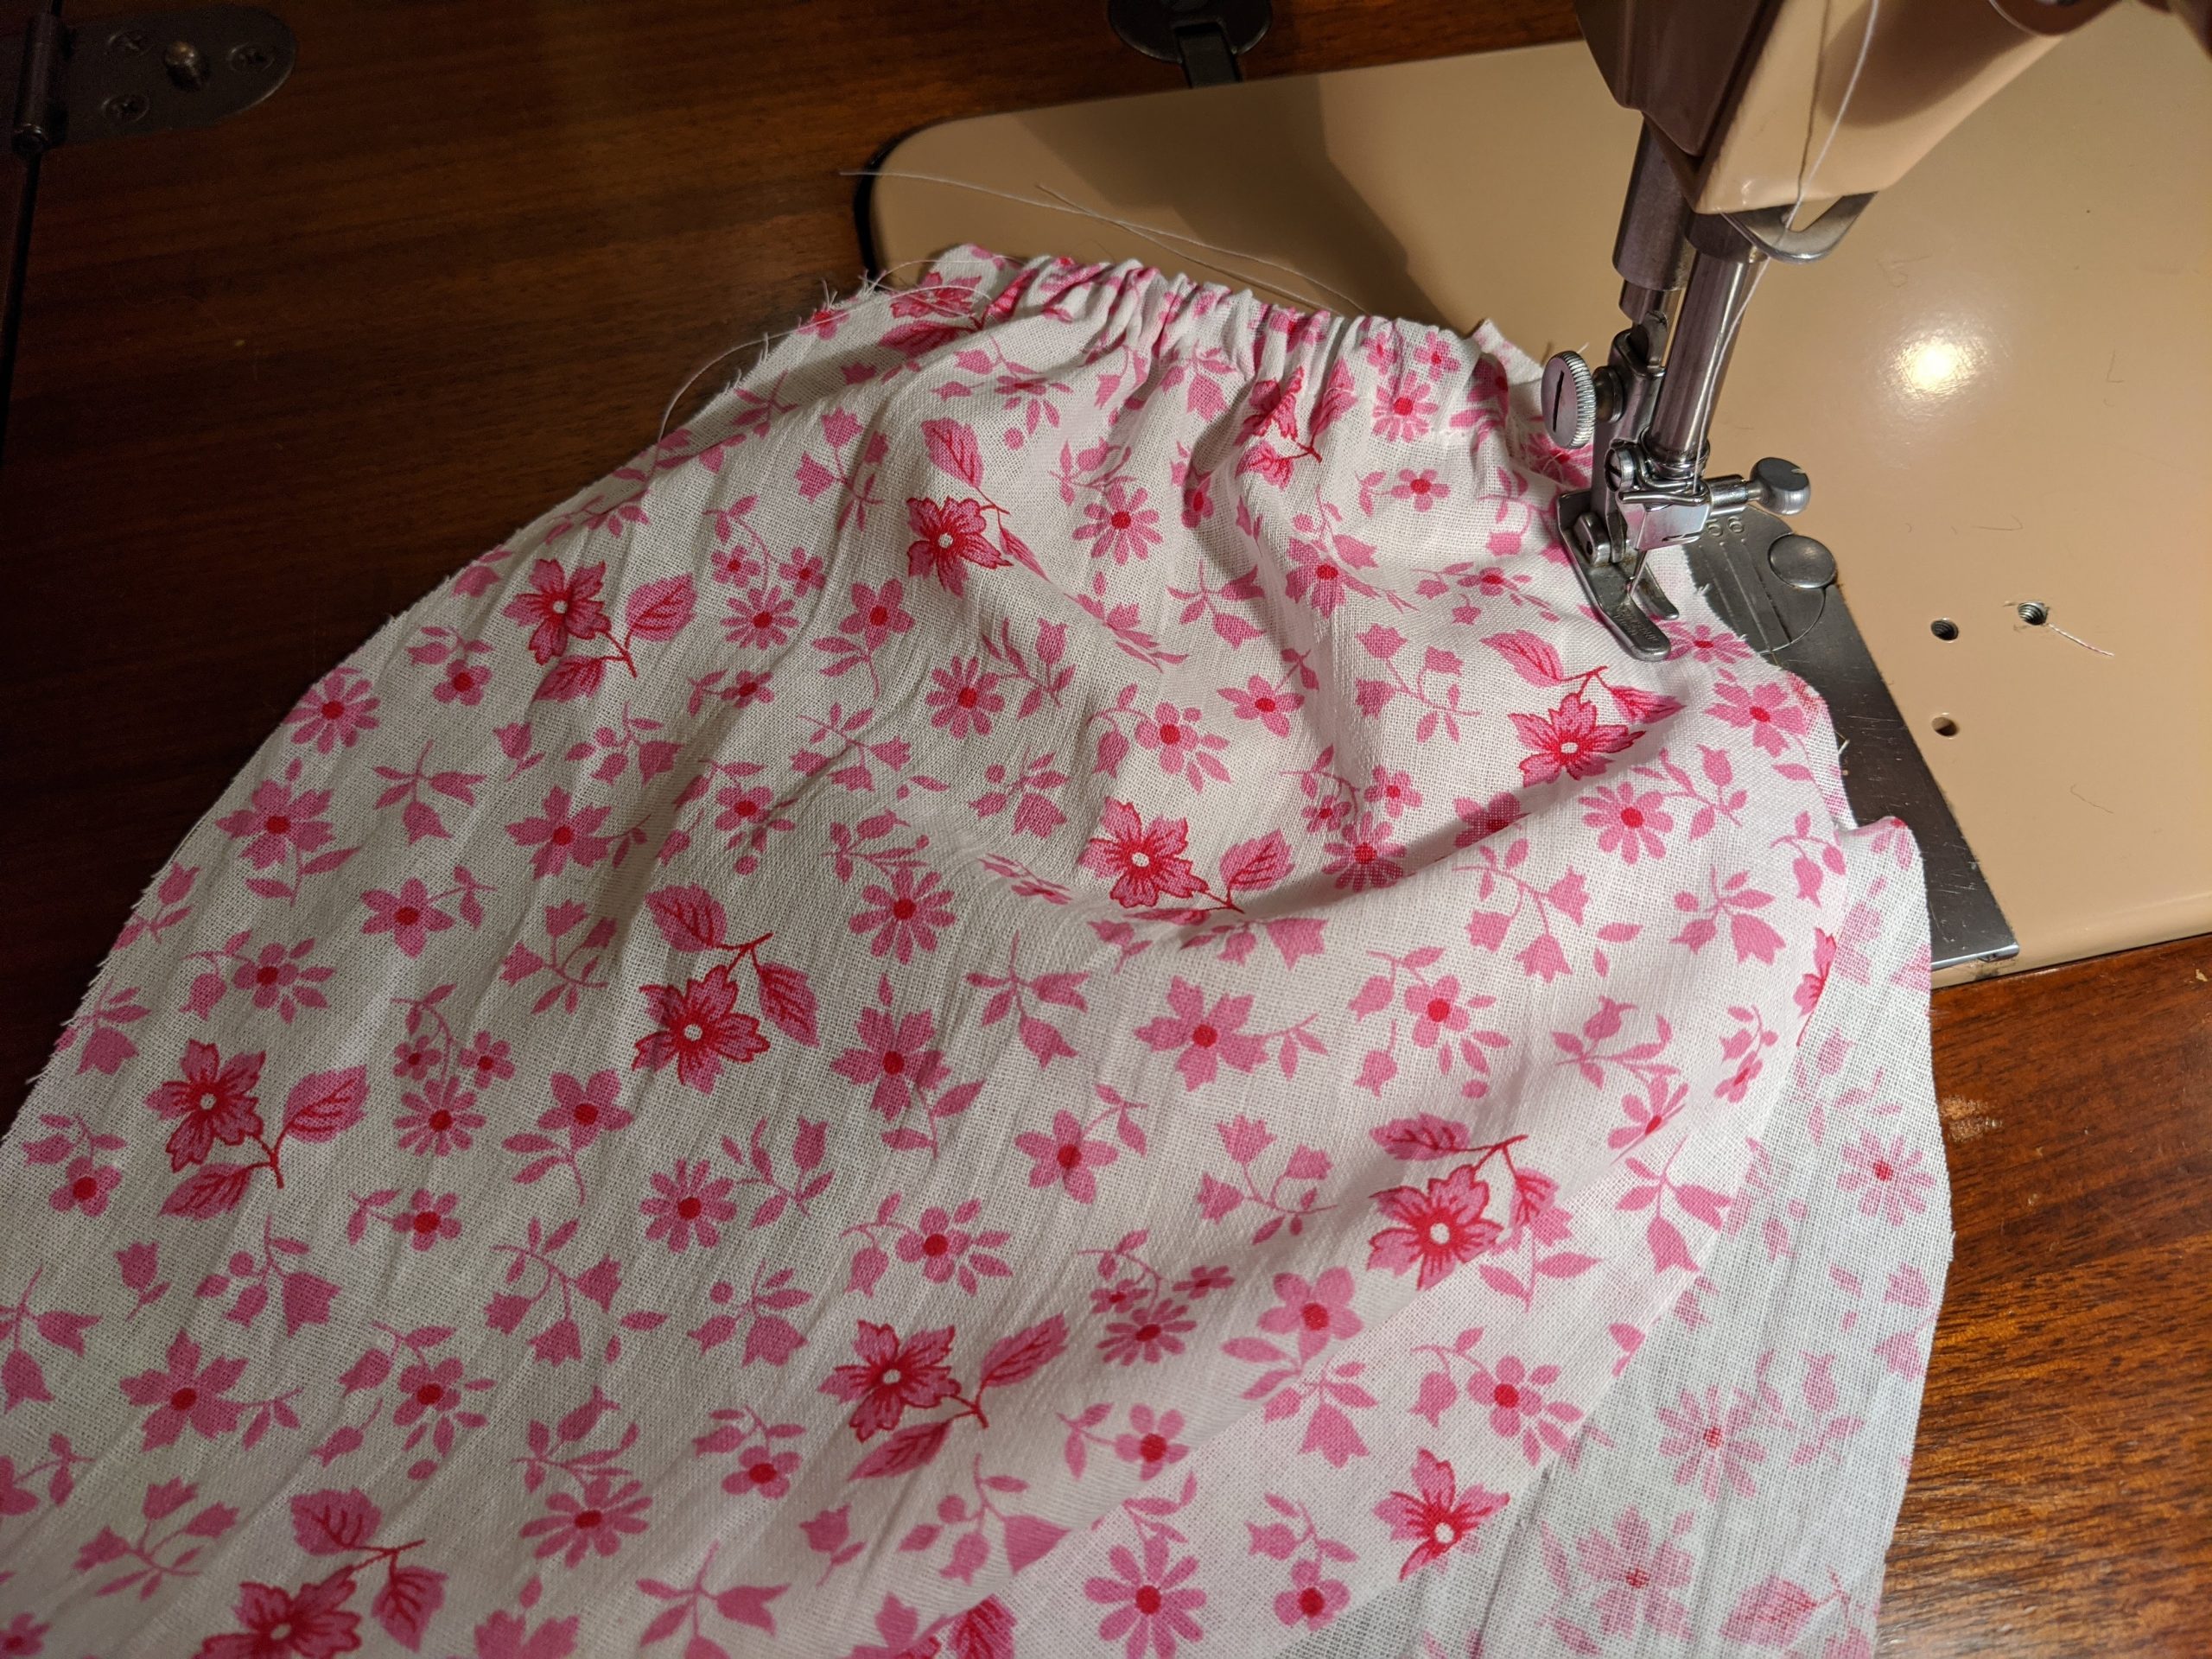
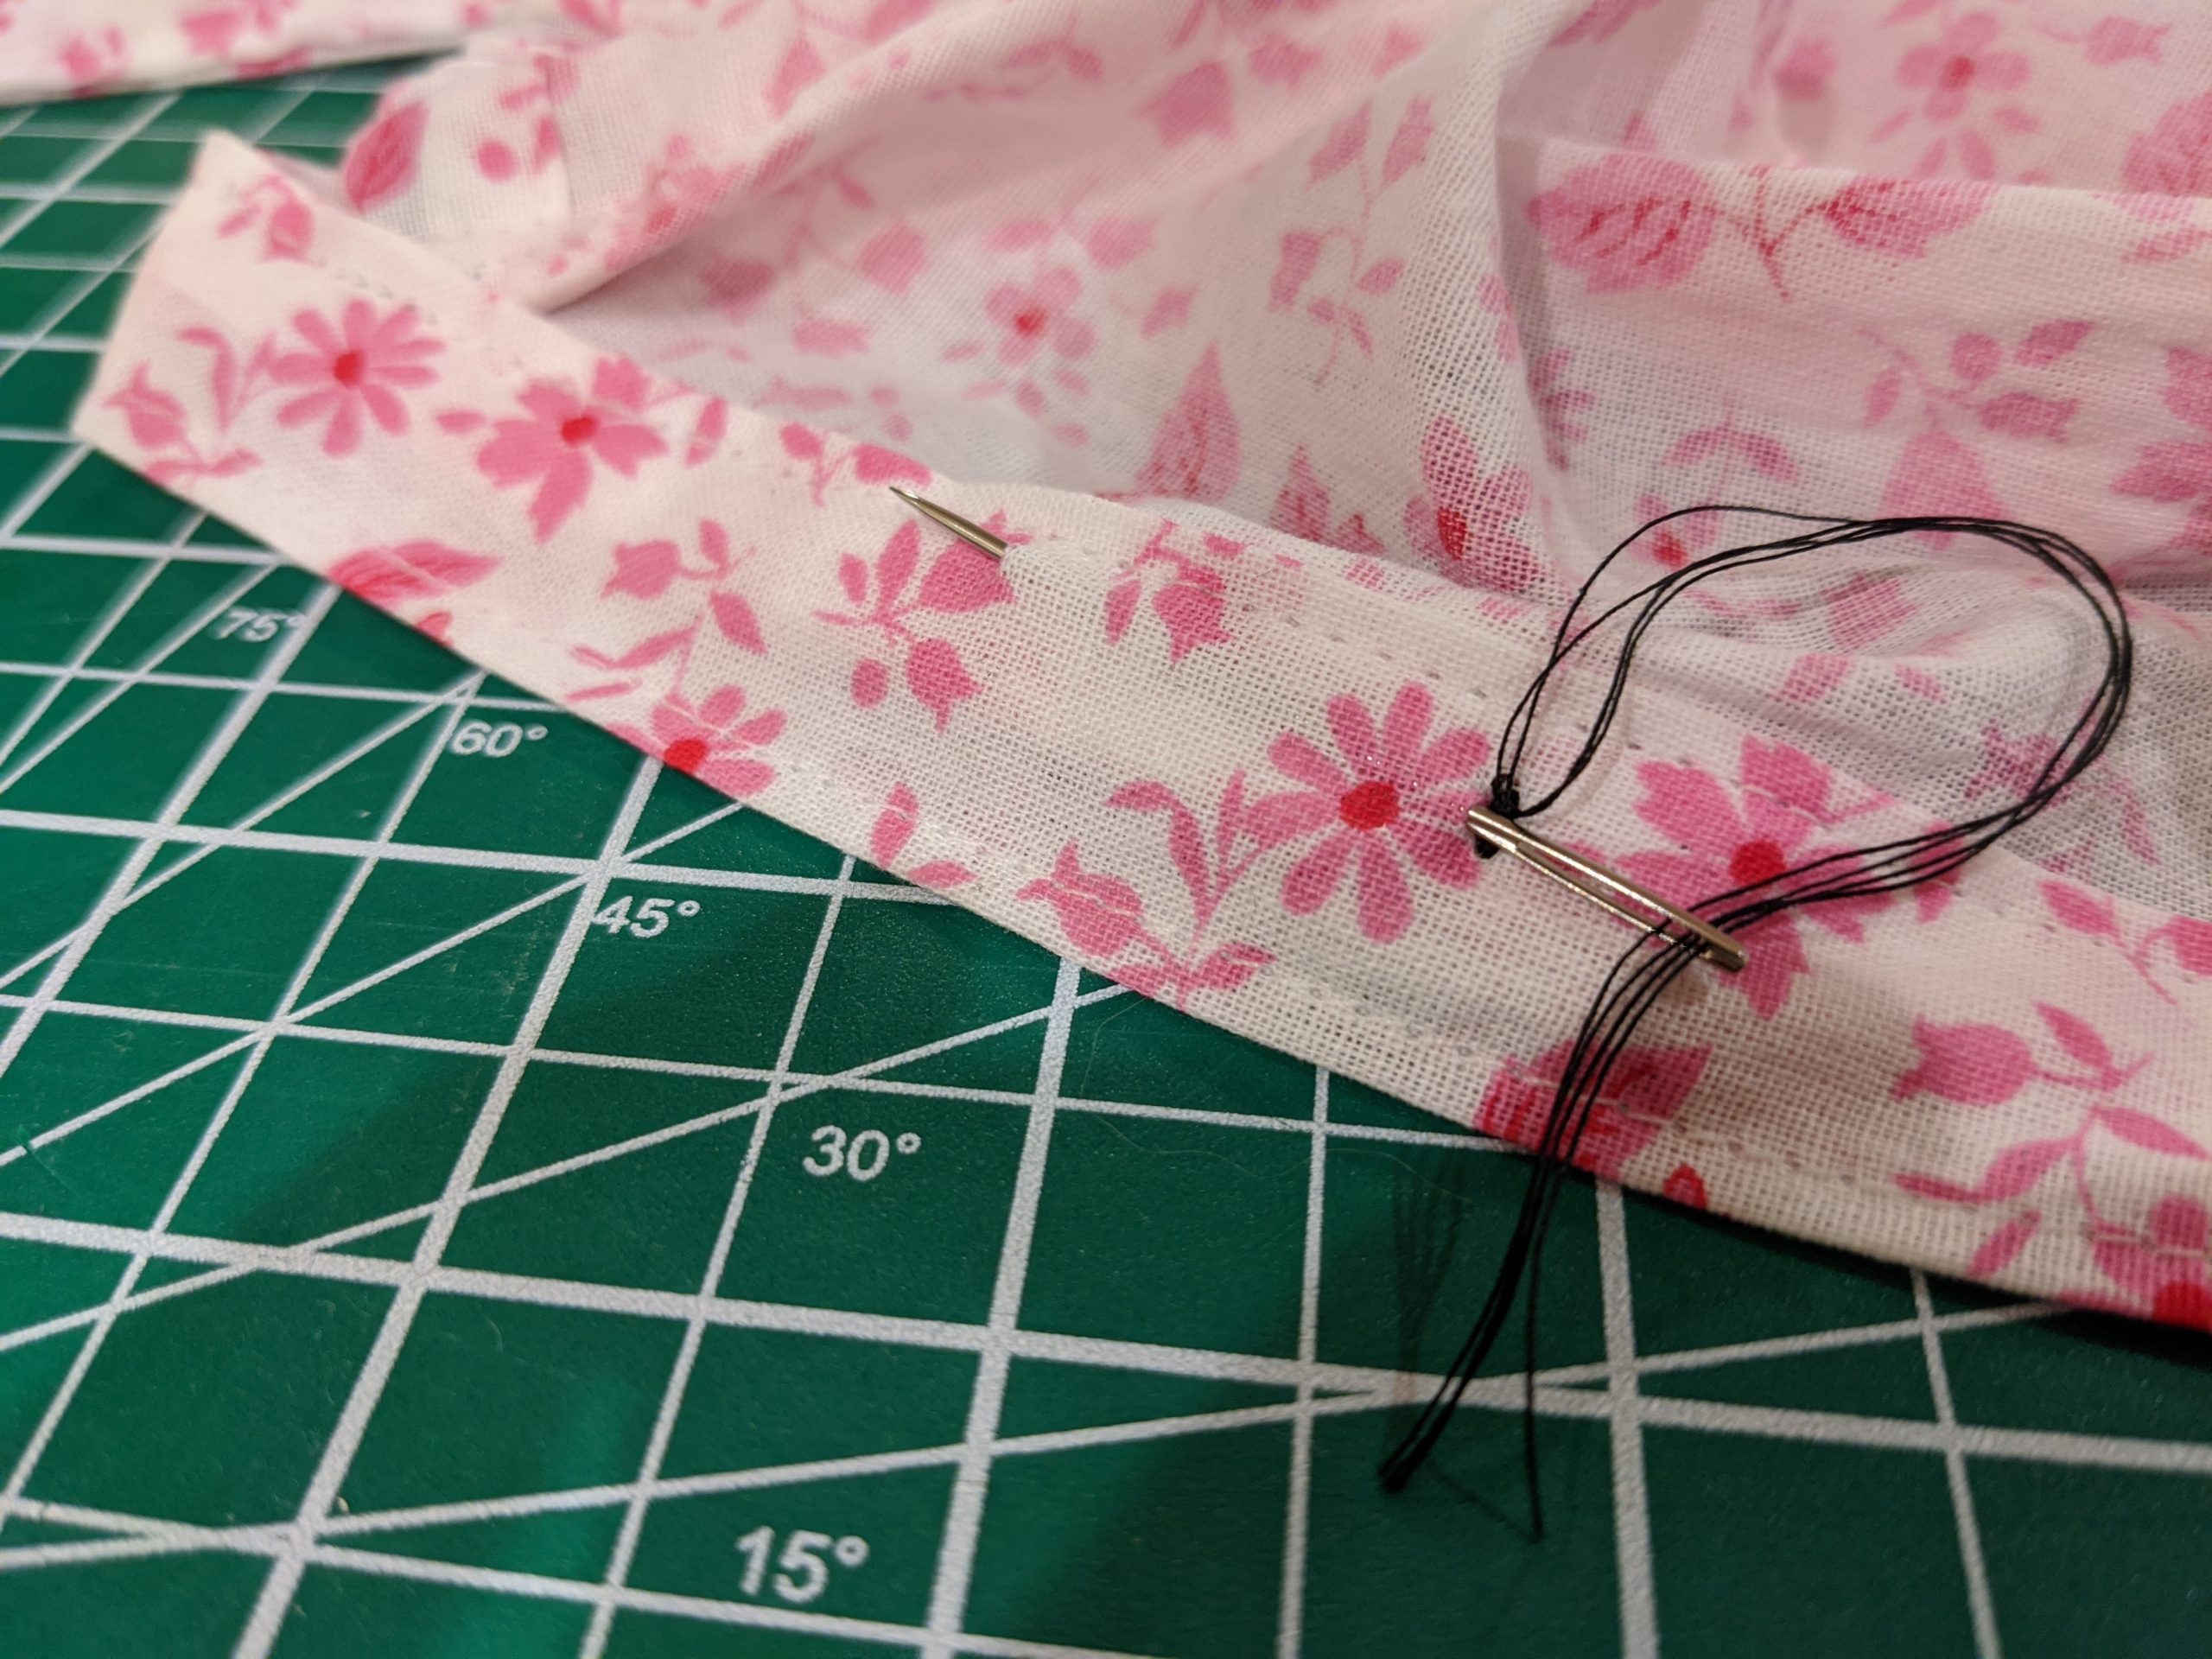
Cut 3″ of elastic (I’m using 3/8″ wide (1cm) elastic) and insert it into the casing using your favorite method (e.g. using a safety pin). Sew a stitch on either side of the elastic to hold it in place. If doing a french seam, make sure there is 3/8″ of distance from the end of the elastic in the casing and the edge of the detail.

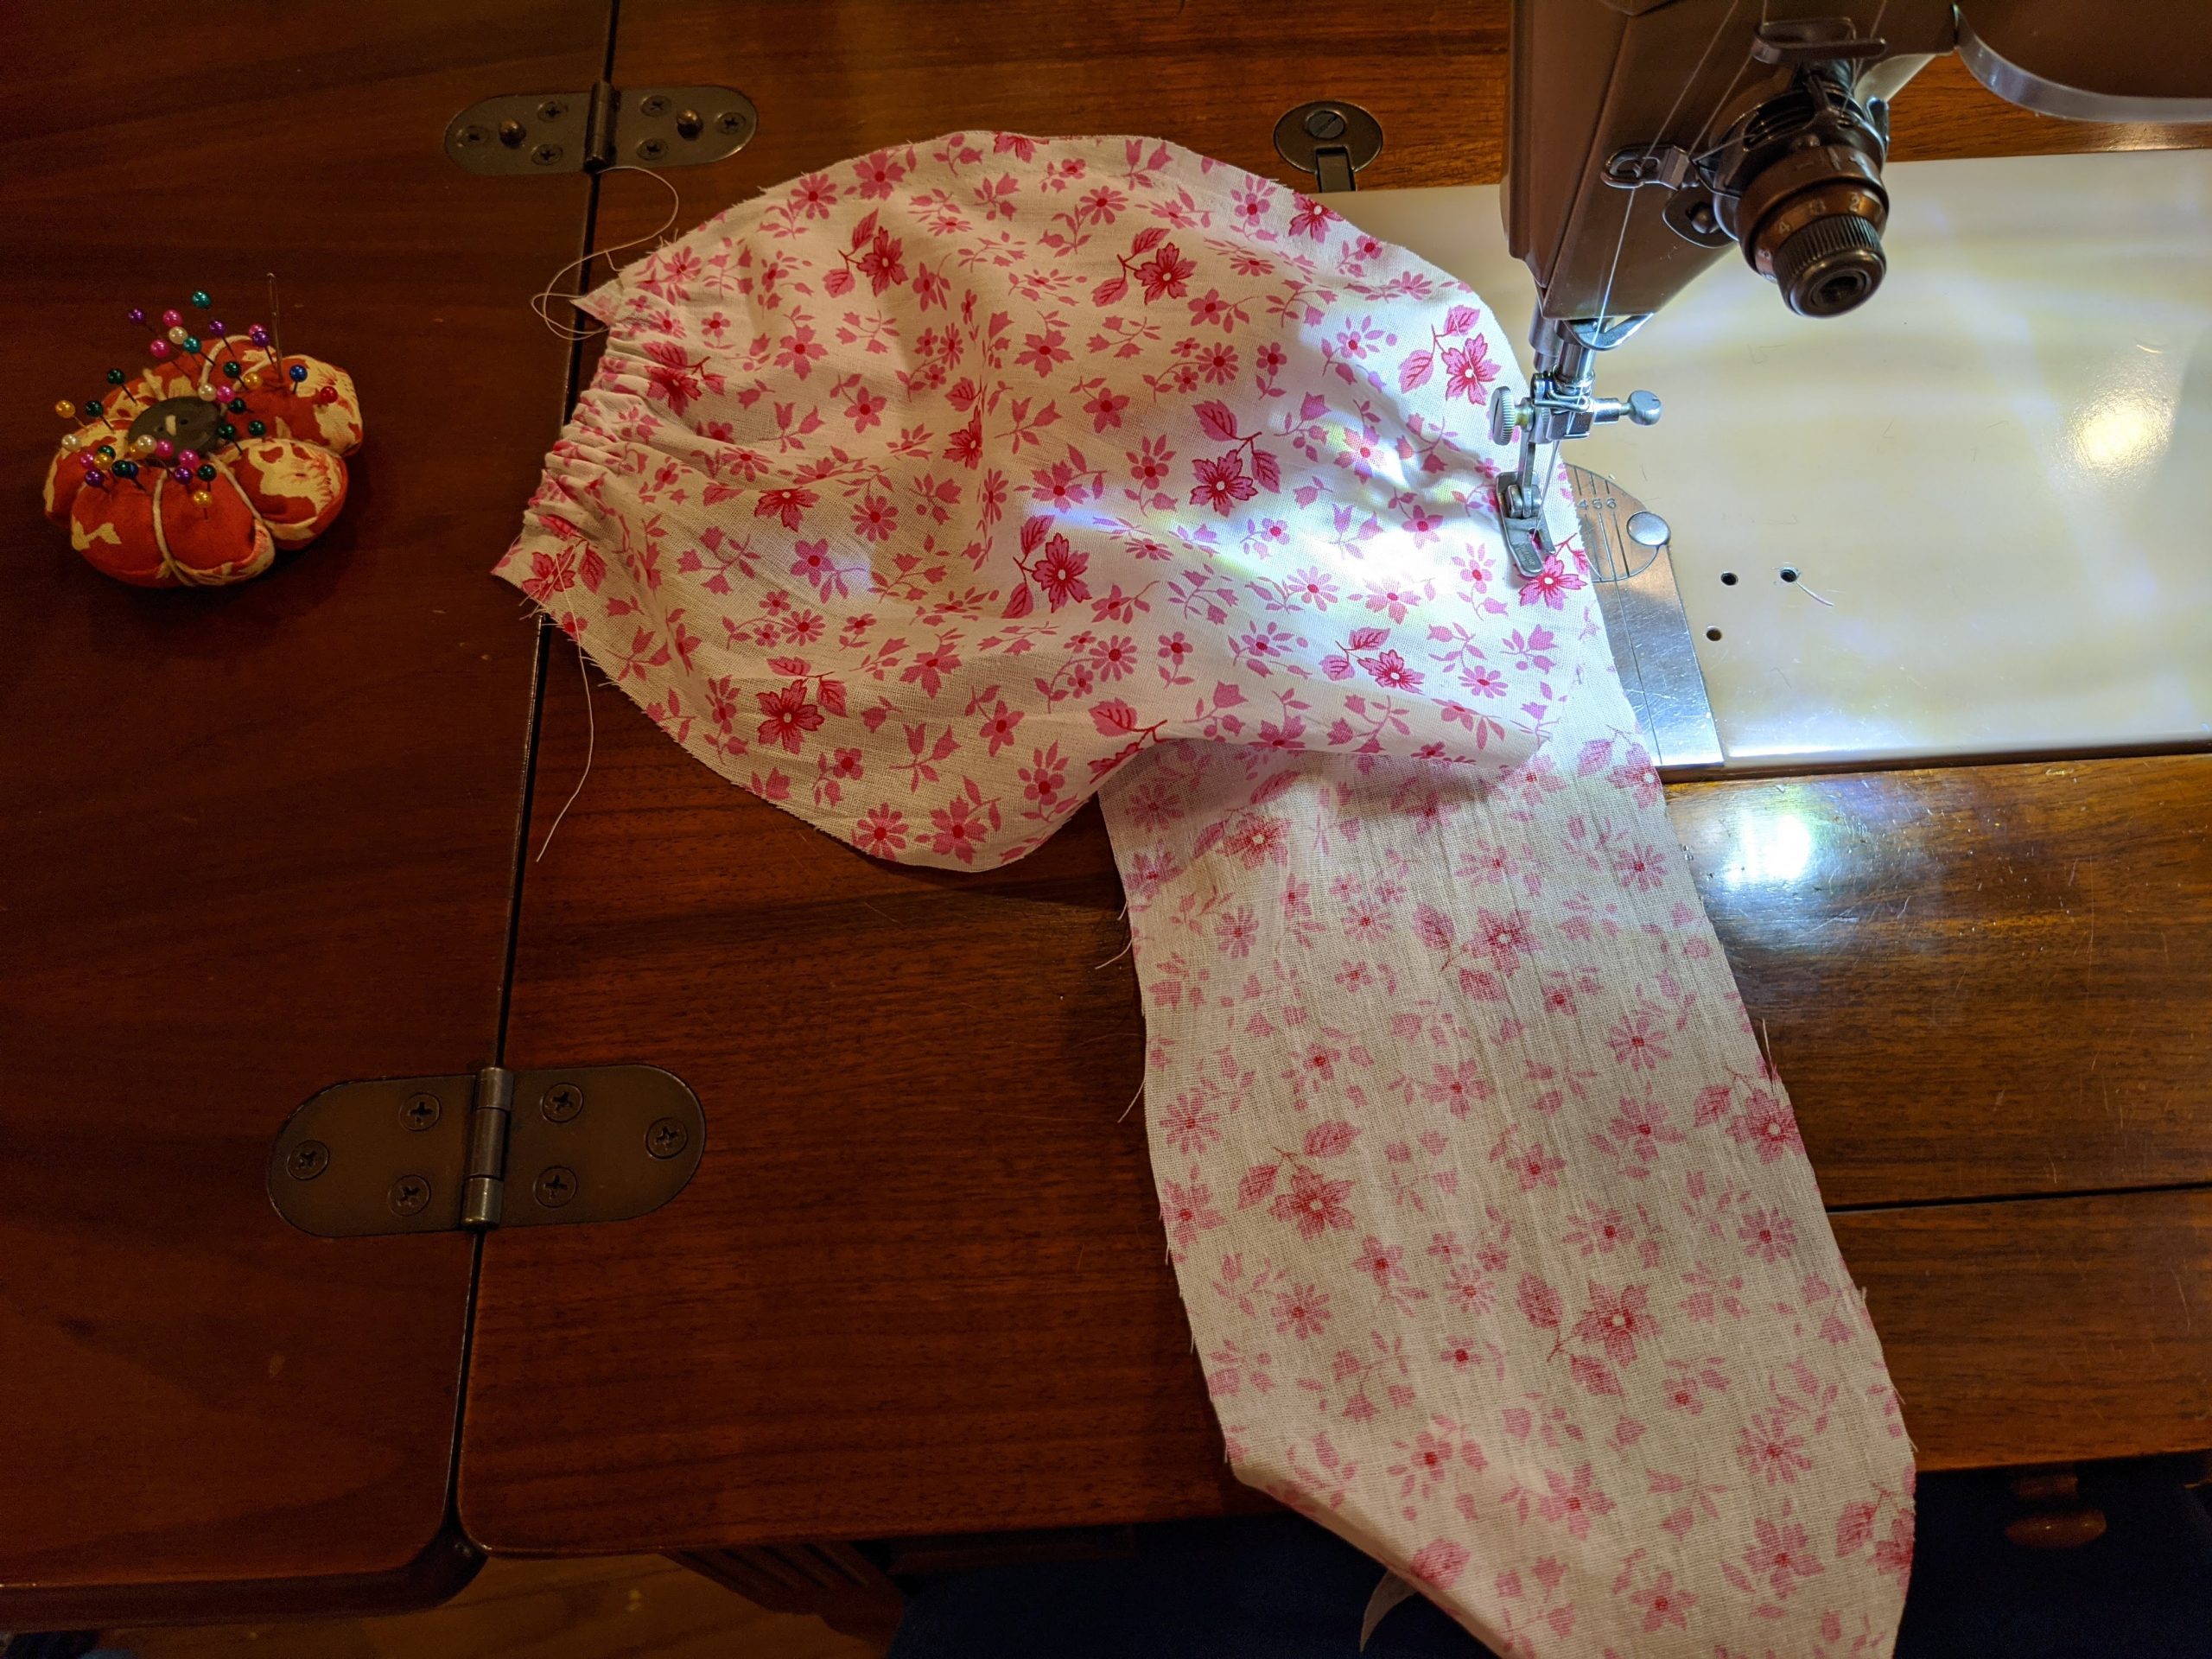
Sew the top to the side
Sew the side to the top. You can pin it in place, but I sew without pinning, just start about 3/8″ (1cm) from the end of the side detail. If not sewing a French seam, sew right sides together with a 3/8″ (1cm) allowance, if sewing a french seam, sew wrong sides together at 3/8″ (1cm) allowance, then trim, turn out, and sew a french seam at 1/4″ (6mm) from the edge.

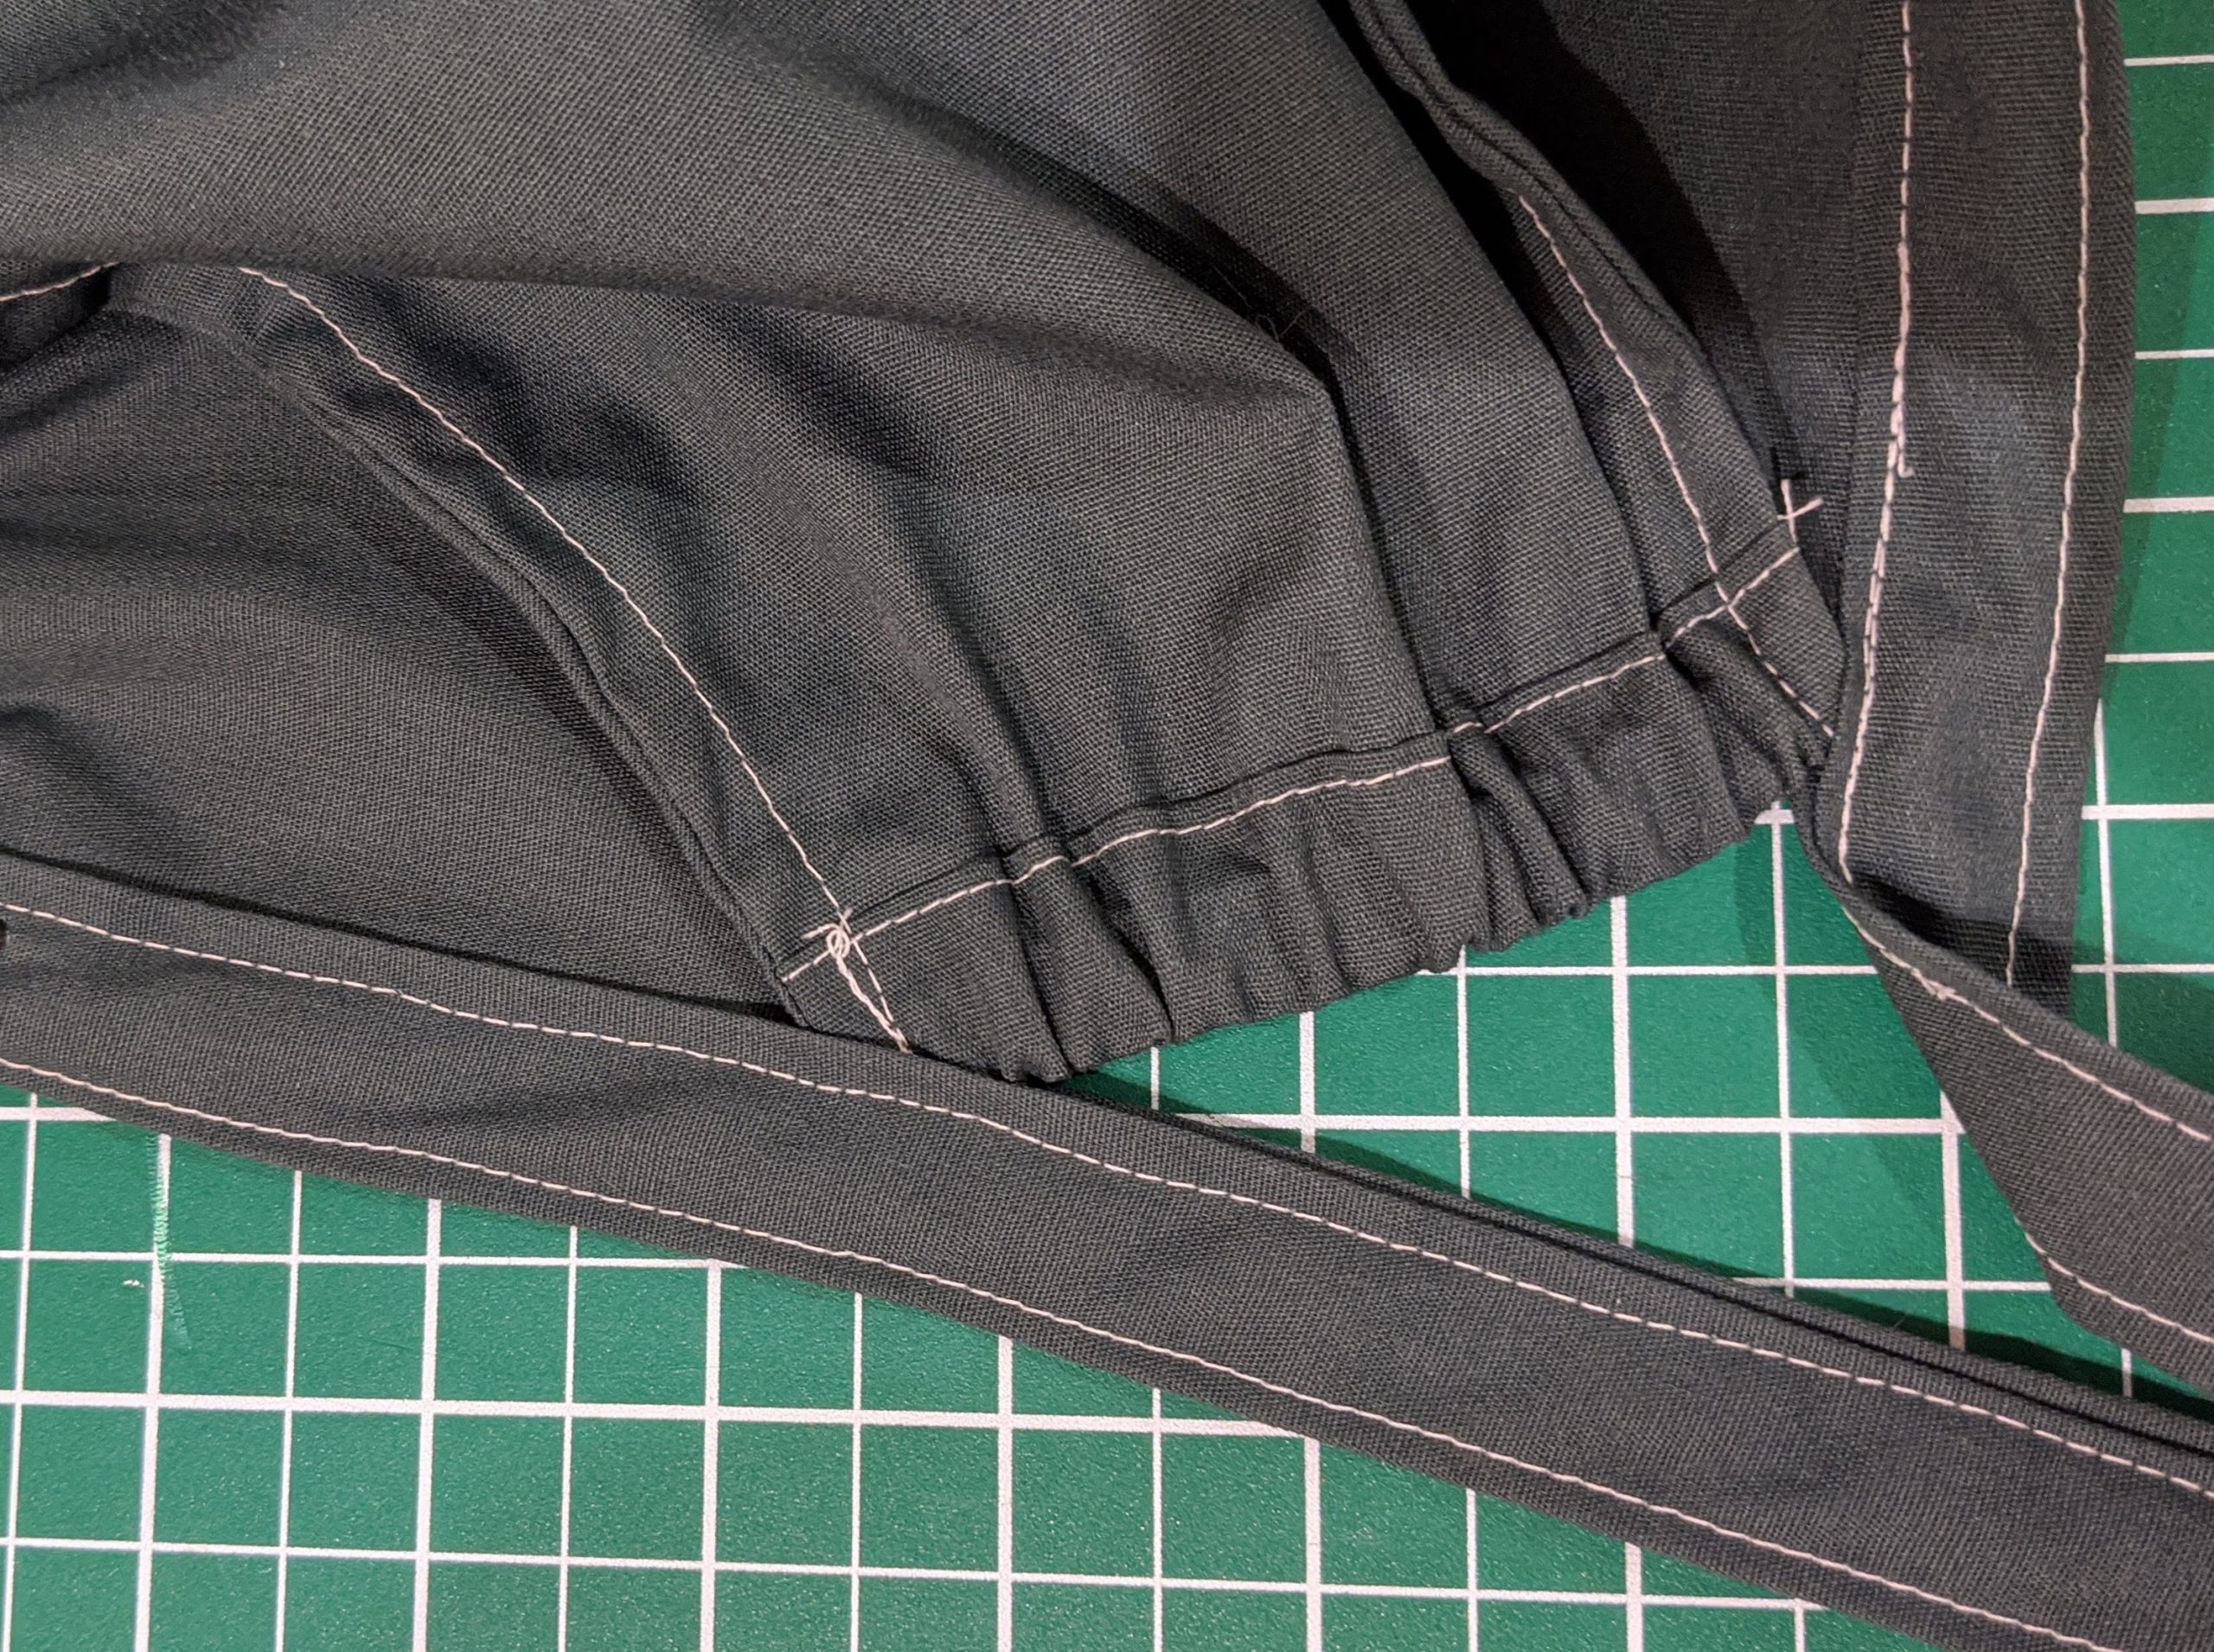
The pattern is designed for the bottom edge of the elastic casing to stop about 3/8″ (1cm) short of the bottom of the side detail. This is to allow for variance in fabric stretch and to accommodate sewing errors. If the bottom of the elastic ends up a bit short of the corner of the side, this is very easy to hide inside the border. However, if it overshoots the corner of the side, hiding that mistake would be a lot more difficult. This is why I designed the pattern for the two details to not meet exactly on point:
Sew the strap/border
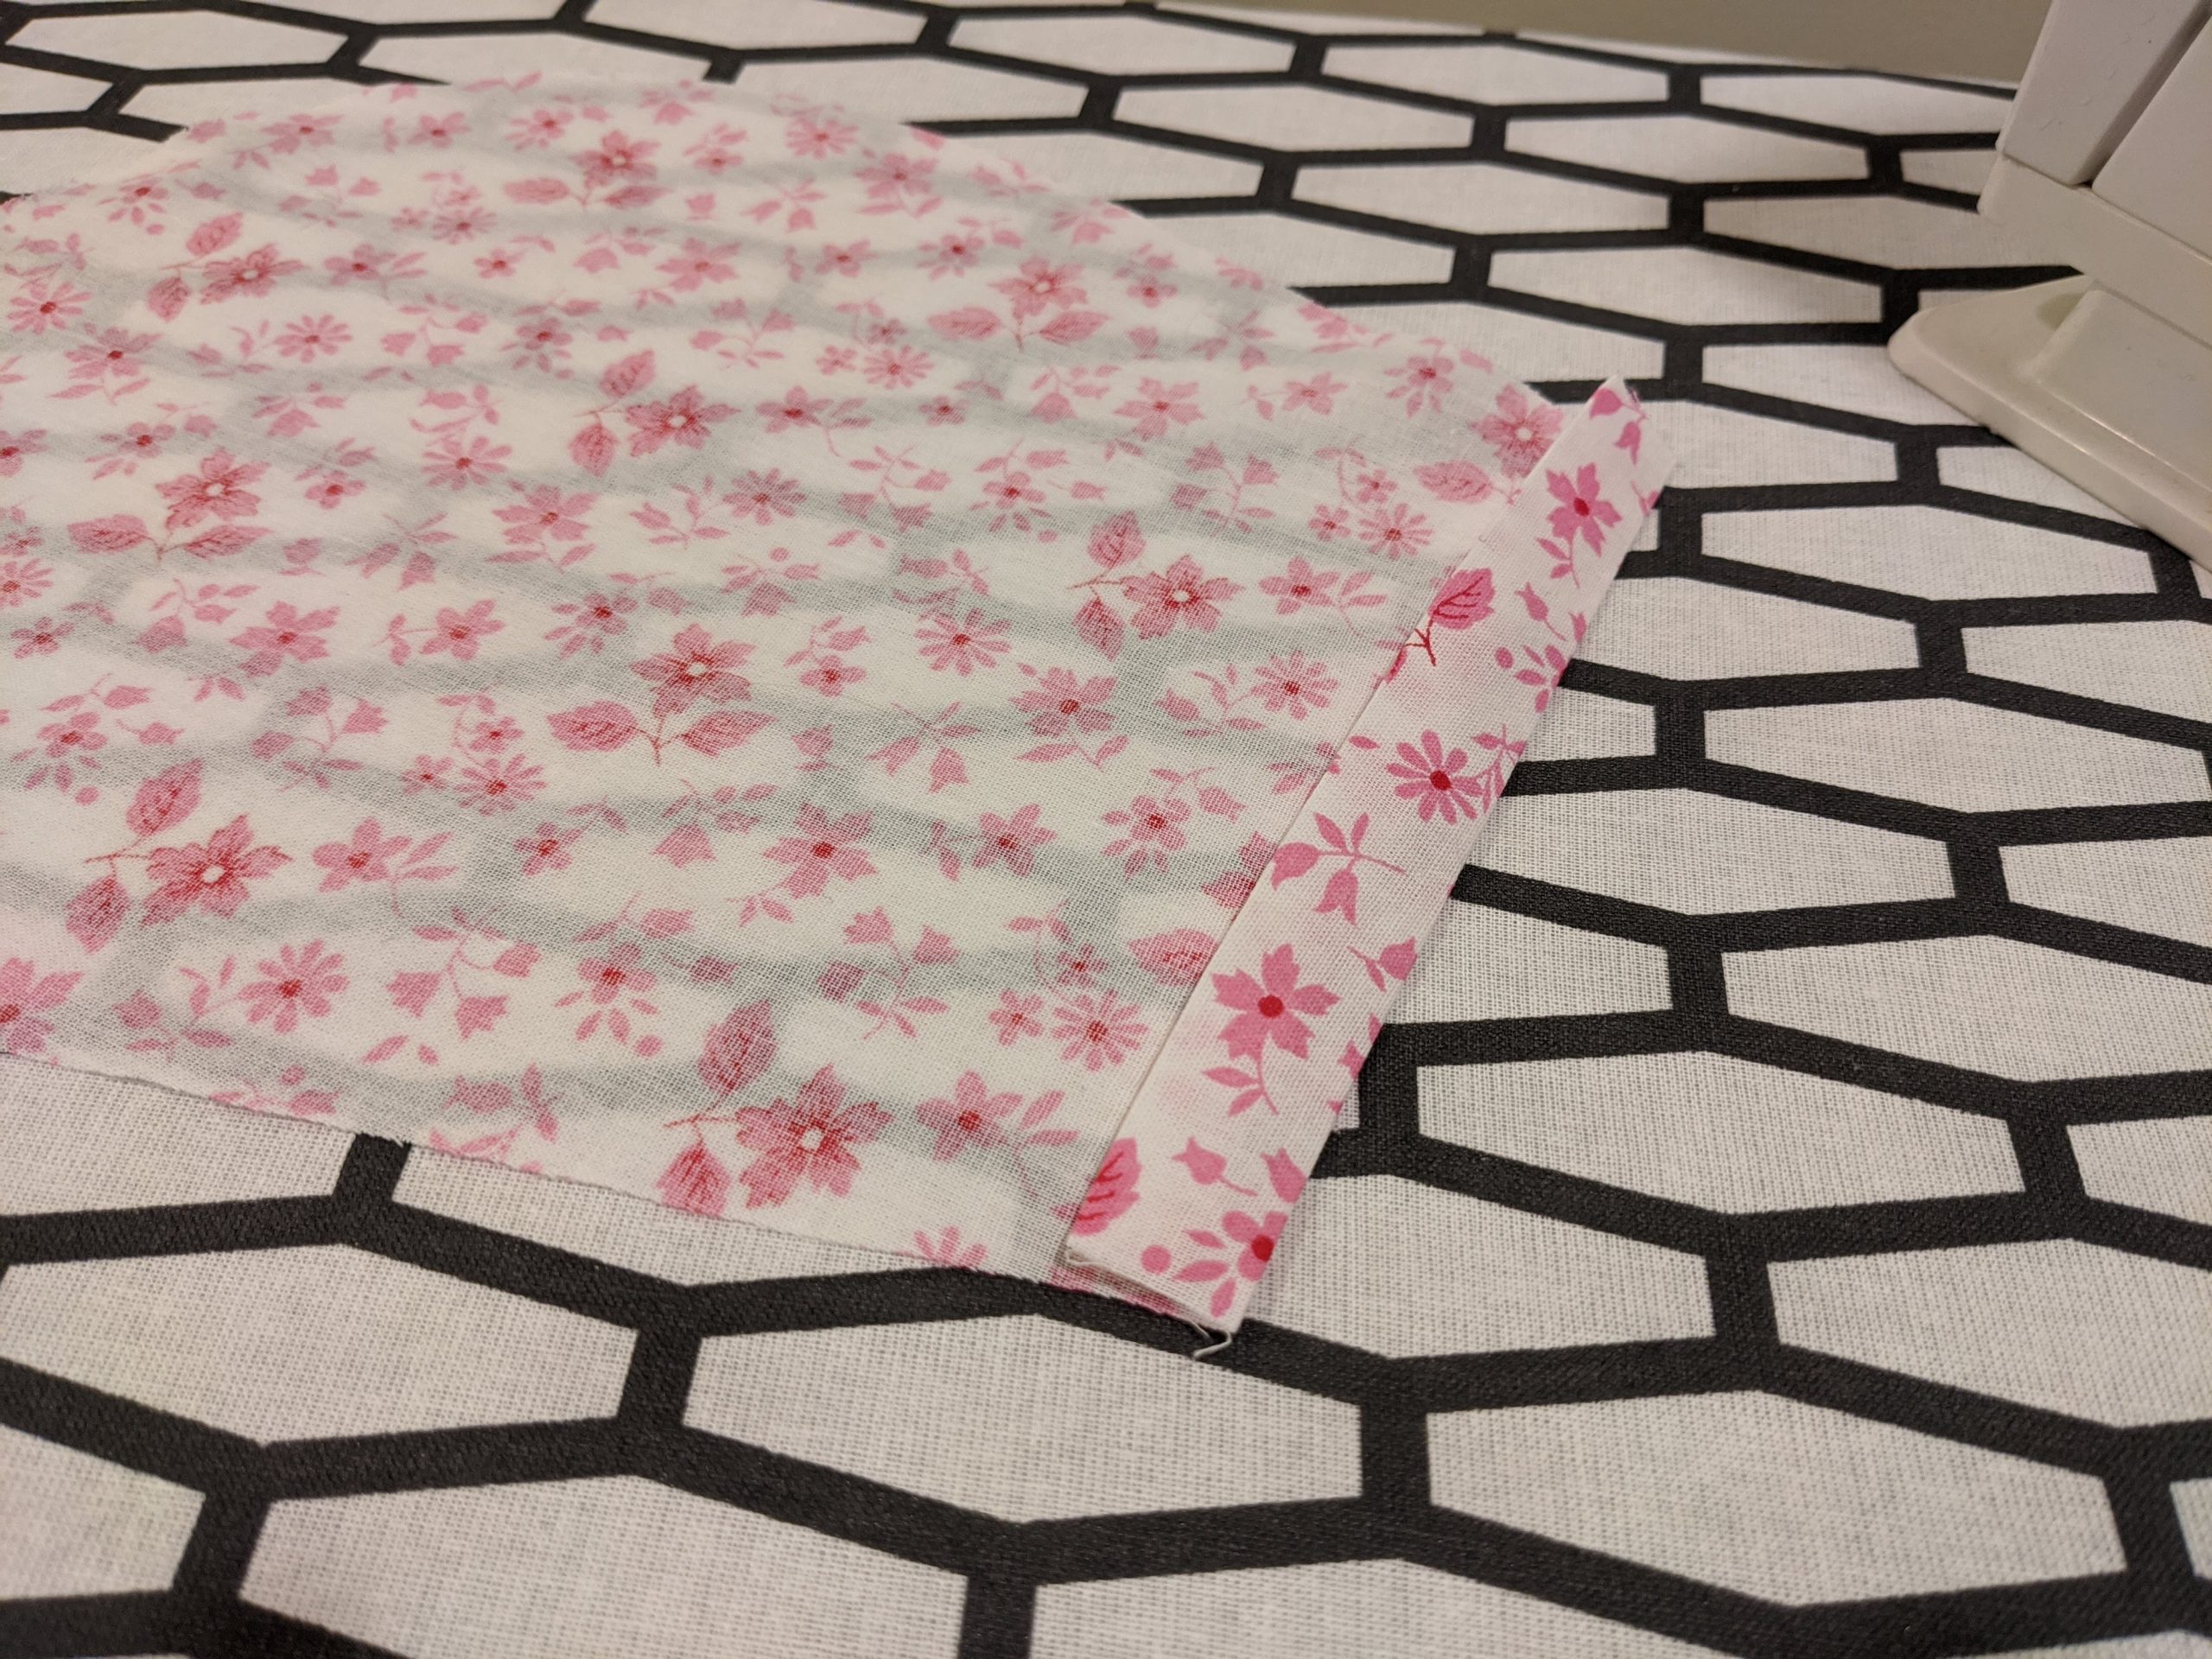
Fold and press 3/8″ (1cm) on each of the four sides of the strap/border detail. Then fold it in half and press.

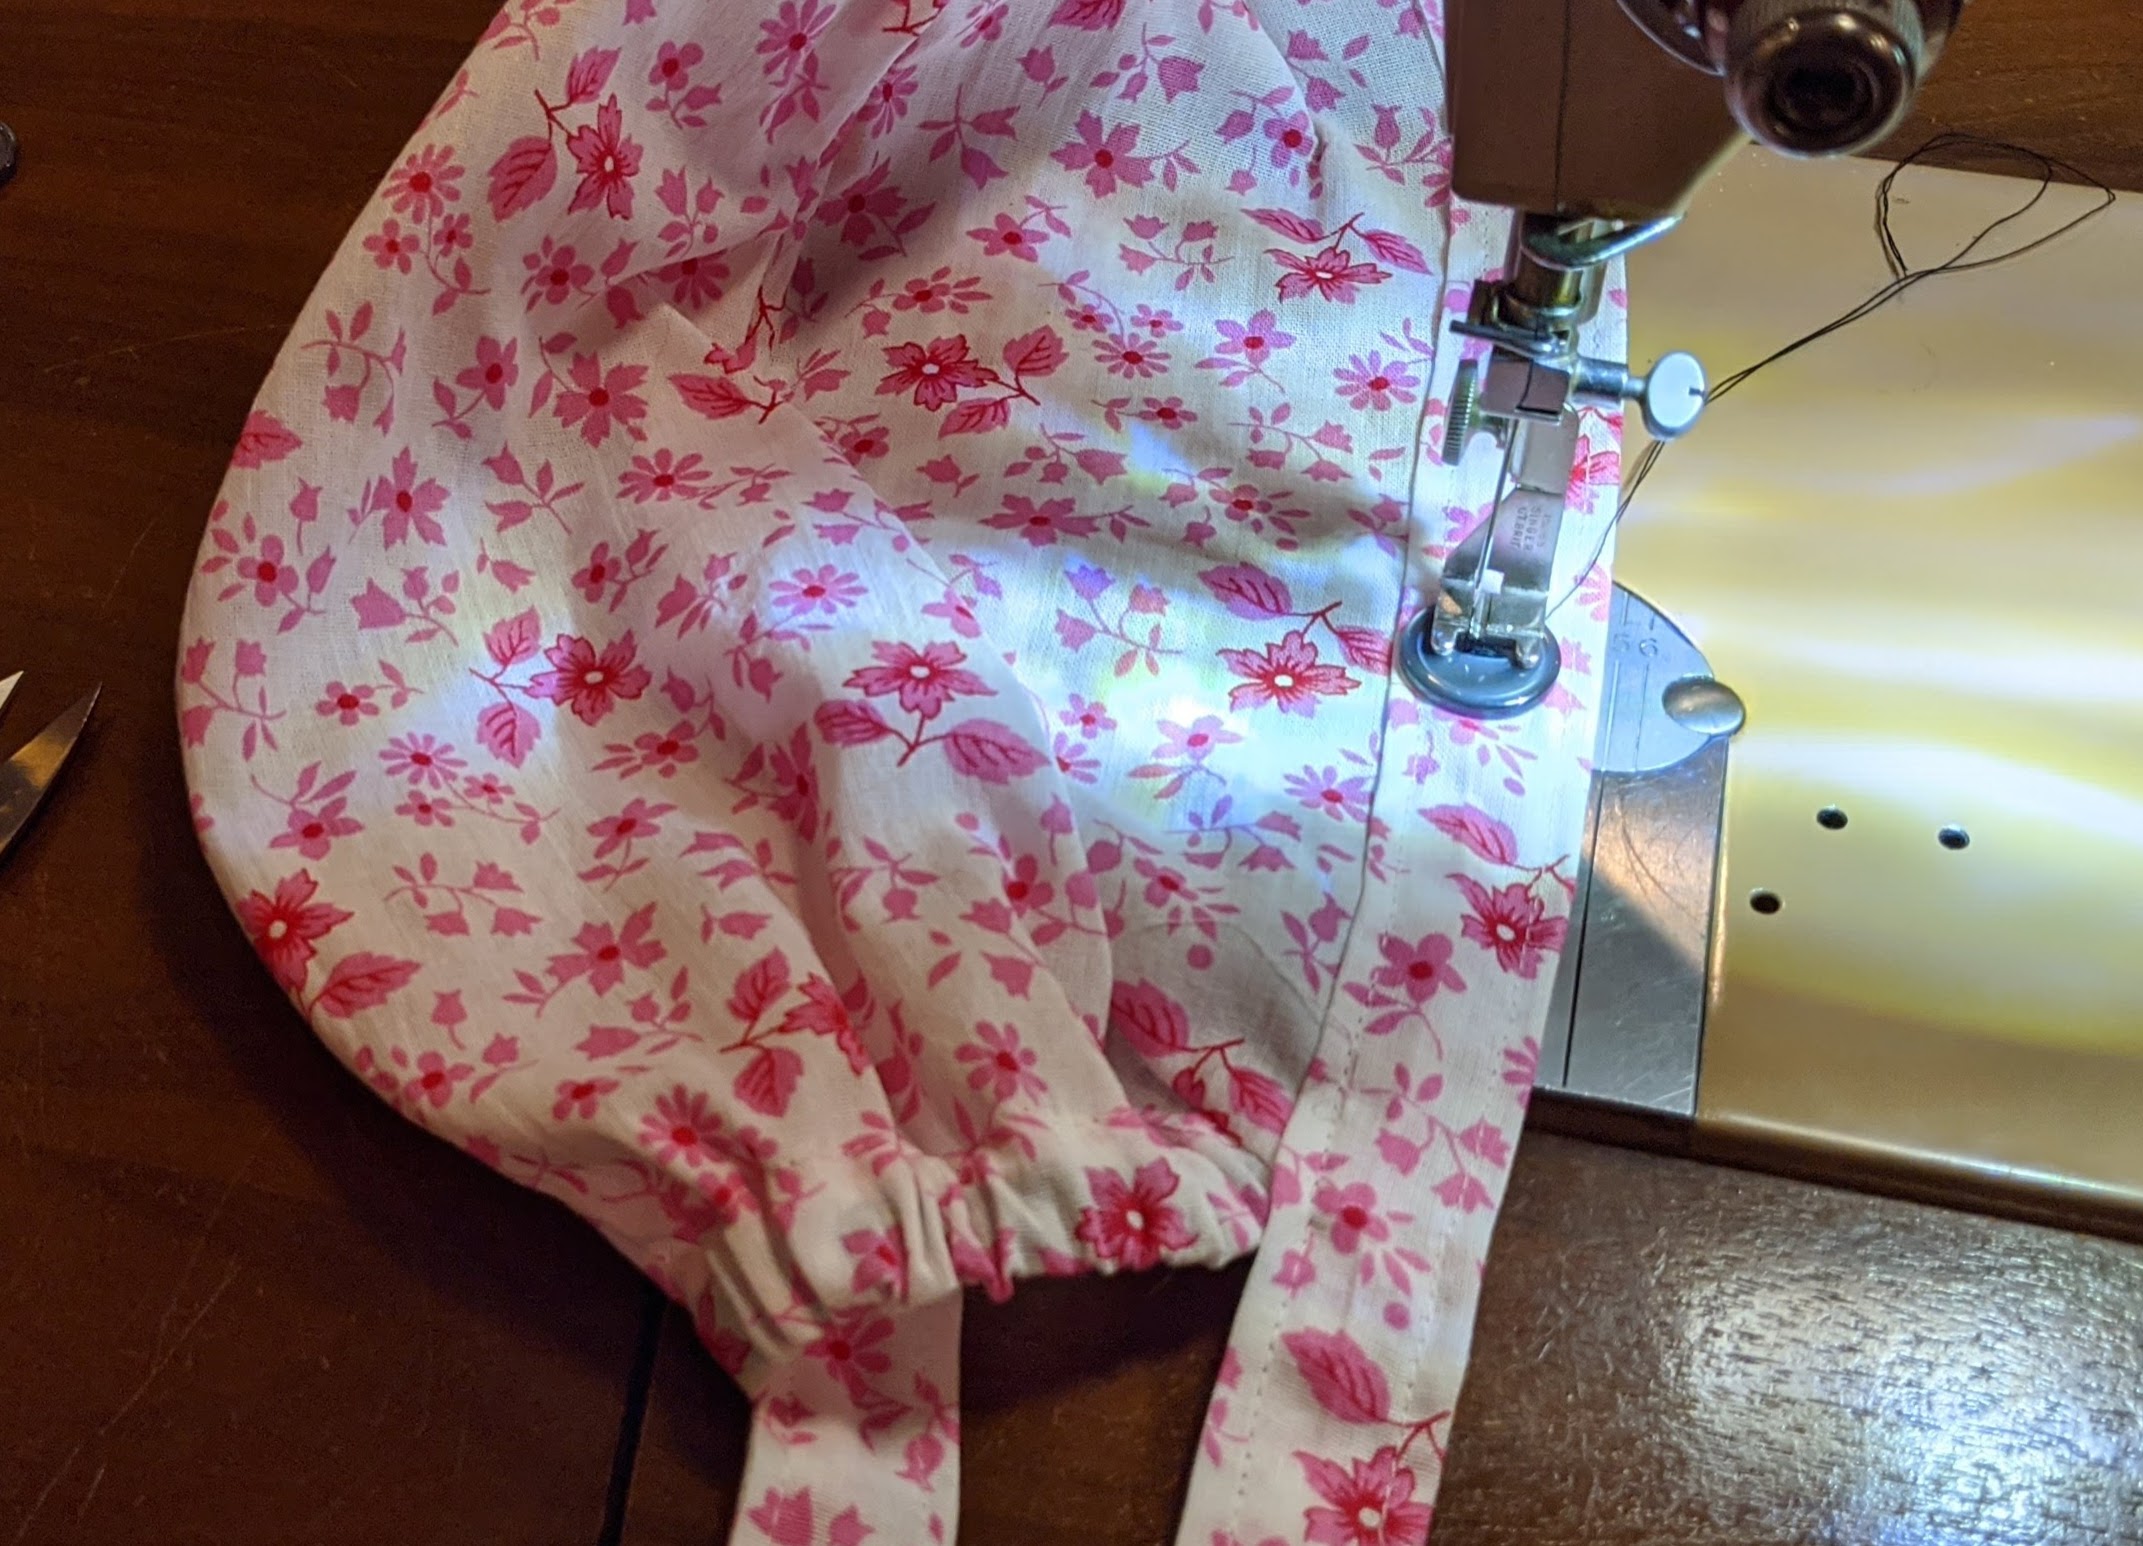
Sew the border/strap to the side, inserting the side into the band by 3/8″ (1cm). Again, you can pin in place, but I sew without pinning, using the folded over edge of the border as a reference for the depth of insertion of the cap into the band. I start at 7-1/2″ (19cm) from the end of the strap, and sew all around the bottom edge of the side, continue to the end of the strap, then make a second pass along the bottom edge of the border/strap.
Push the cap a little bit deeper into the border around the area where the french seam ends, so that the top stitch along the border seam catches the the corner of the elastic.

Sew two buttons, at 7″ (17.8cm) from the center of the forehead, on the border. I use 30L buttons, which are 3/4″ (19mm) diameter. Use a hand sewing needle to bring the threads to the inside, tie a knot, and hide the ends into the border.

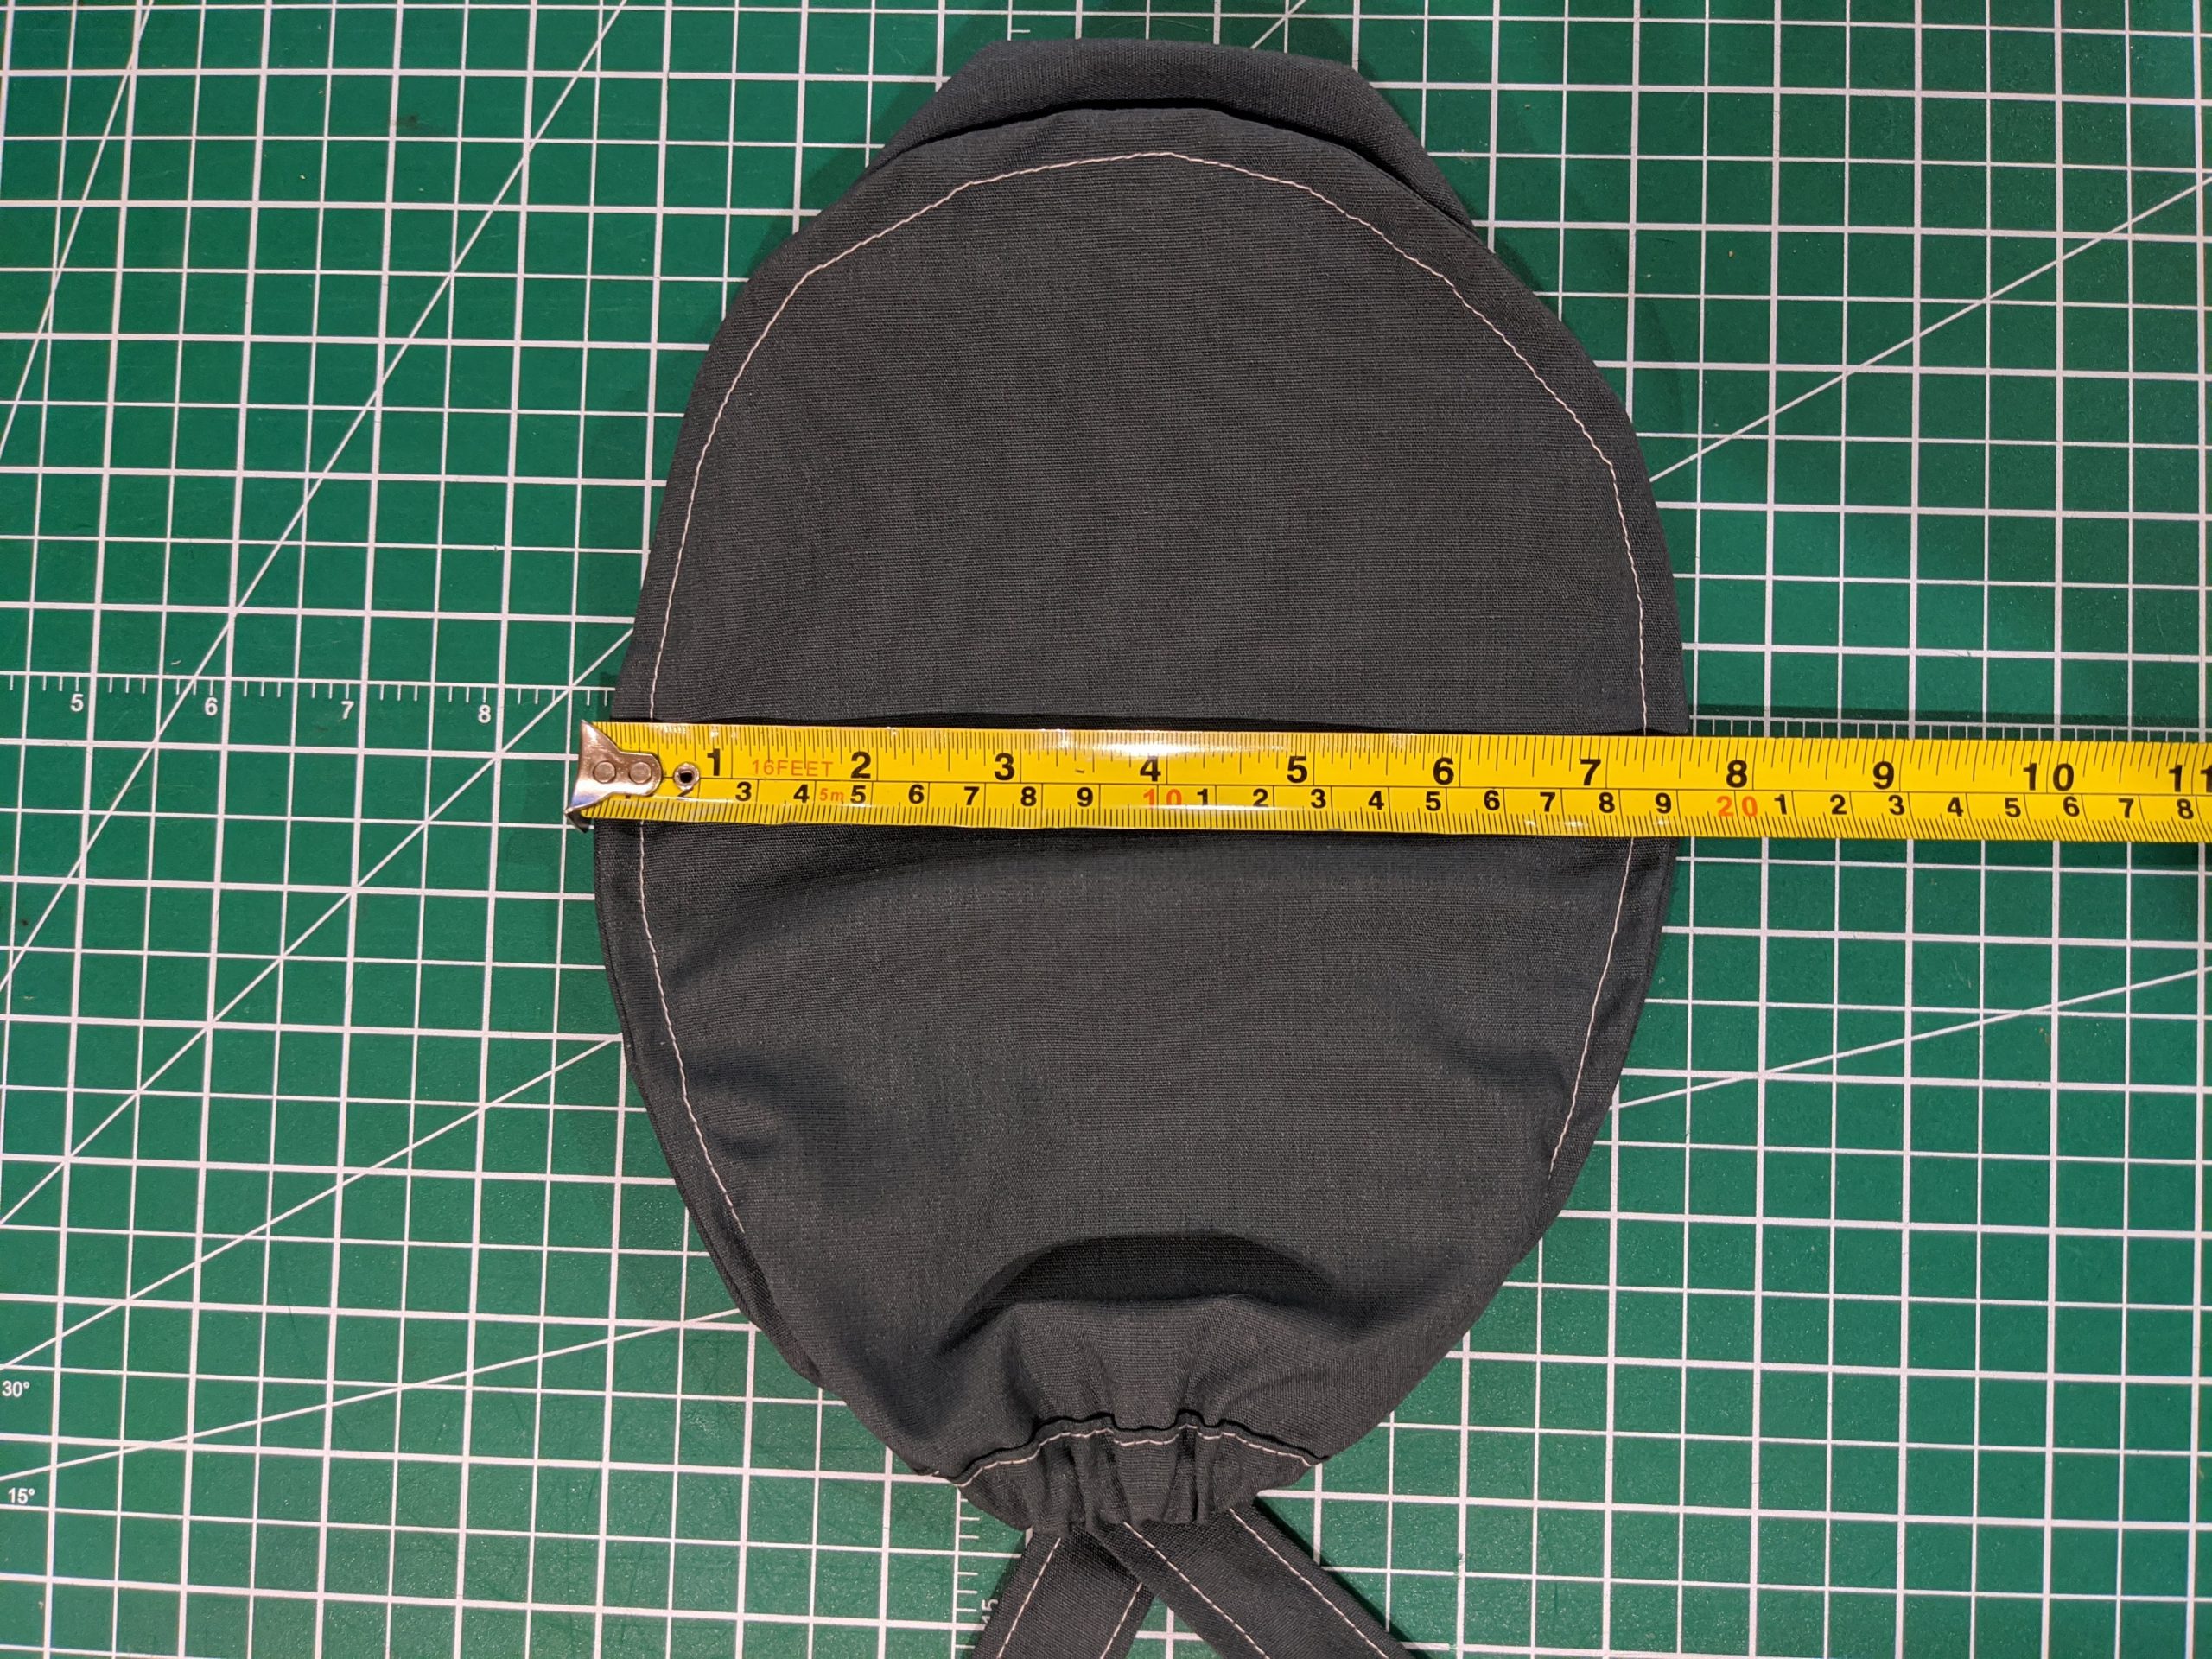
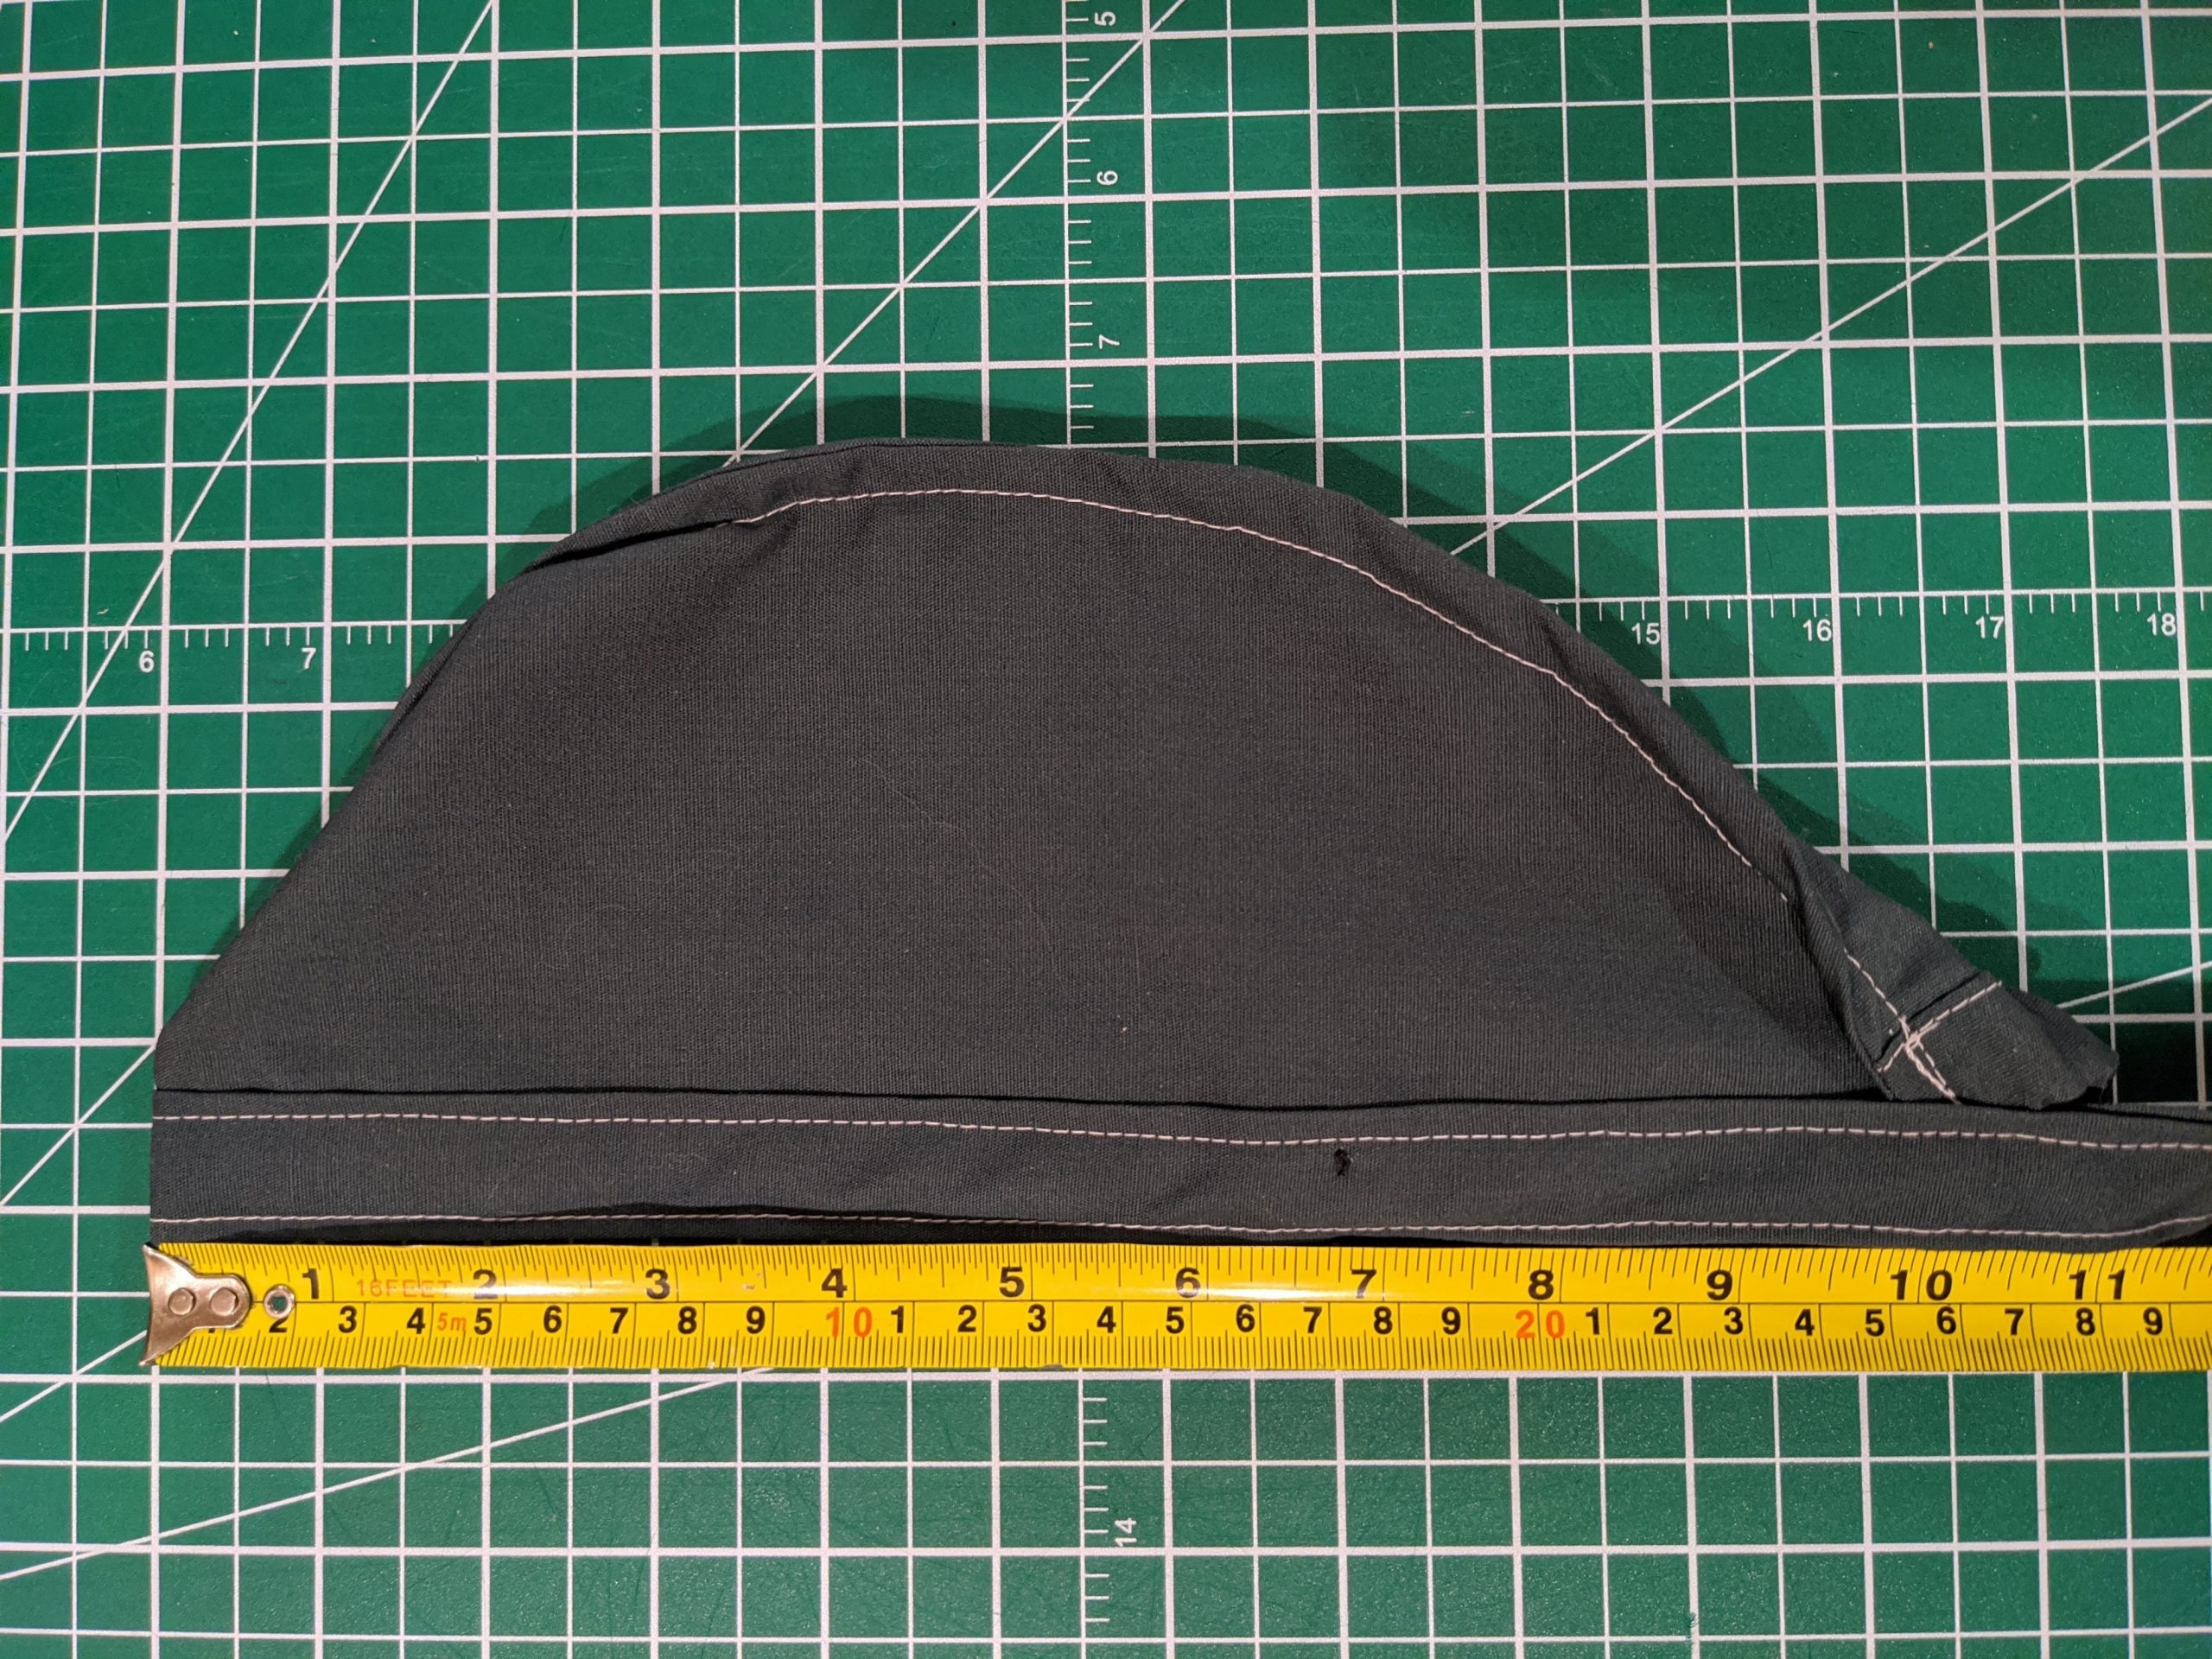
Here are some measurements of the finished cap, for your reference:

If you have any questions or comments, please do not hesitate to post them in the comments section below. If you find my design useful, you can buy me a coffee.
Looks great! Can you please email me a pdf of pattern as I was unable to print this from your post. I am a sewer in Newmarket part of HM4 HH.
Bonitasbest@hotmail.com
Thanks!
Susan
Hi, Susan, I understand that you were able to download the PDF eventually. Let me know how everything works out.
I went by the size of the pattern for a French seam, the cap seems very small, can the pattern be expanded
Hi, did you measure the two 10 cm reference lines (vertical and horizontal) on Page 3? They are there to make sure that the pattern was not scaled when printing, and should measure exactly 10 cm.
Hi,
I came across your patter after viewing Lea Goes Green’s. Is this pattern smaller than hers? What did you adjust in terms of sizing?
Hi, Alea, I made the pattern a bit smaller in all directions, and added some volume in the back of the top by making the top’s back side a little wider (to allow for tucked long hair). The caps I make are still fairly large, and fit even large heads, but work for smaller heads, too, thanks to the ties in the back.
How much fabric is required for one cap?
Each cap takes about 2 square feet (0.2 square meters) of fabric.
How much fabric do I need to make one?
About 2 square feet (0.2 square meters).
thank you for this, questions.
What is the elastic size (the width to use) as it says 3″ long but not the width.
Also does one line the inside of the scrub cap? Good idea or bad? I am going to be making one for someone so i am not sure what is the standard.
Thank you
The elastic I’m using is 3/8″ (about 1cm) wide. Slightly narrower or wider would also work.
As for lining the inside – I am not sure. It seems to me that the cap should be as breathable as possible, so, in my opinion, the thinner the walls, the better, but I am not a nurse. I don’t think there is any functional reason to line the inside.
Please translate ~ 2 square feet how many yards fabric? Thank you!
Hi, Diane, this depends on the width of the fabric. Assuming 54 inches wide fabric, 1 yard is abou 13.5 square feet, so should yield about 6-7 scrub caps.
One thing to keep in mind is that the longest detail (the border/strap) is 37 inches long, which is slightly longer than one yard, so you should start with a bit more than one yard of fabric if you want to align the straps to the straight grain. Aligning it to the cross grain would also probably work, depending on the fabric.
I made this for my sister who is an ICU covid nurse in NYC and it has saved her ears! I will be making more for her colleagues! Thank you so much for the pattern and instructions!
Hi, Johanna, thanks for leaving a note, it’s great to hear that this worked out well for you. I’ve already made more than 70 of these caps for the local hospitals, the nurses really appreciate them. There’s nothing like seeing smiling faces of medical professionals during a pandemic!
This is my first time making the scrub cap, I used a slightly thicker weave fabric, it turned out easier than I thought with your instructions and patterns. Thank you. I will try to make a more breathable one next to use in dental office.
Thanks for commenting, Lucia, I used some thicker fabric for this pattern. Making a French seam is a bit harder with heavier fabrics, but definitely possible. Other than that, the pattern works fine with thicker fabrics. From the feedback I’m getting it seems that the nurses prefer lighter fabrics, so that’s what I’ve been using predominantly.
Would you have any guidance on using this pattern but adding in the back to create a pocket of sorts for longer hair and ponytails to fit in/be covered?
Hi, Kylee, I would like to make a “long hair edition” of this pattern. According to reports I get, short to medium length ponytails can be tucked in the original pattern, but people with lots of hair cannot tuck it in without affecting the fit of the cap. Here are my thoughts:
1. Creating the bulk for the long hair can be accomplished by widening the back of the top piece. If that is not enough, the curve of the side piece can also be modified. The thing to watch out for is to maintain the seam length the same for both details.
2. There is a potential issue with the weight of the large volume of hair tucked into the cap pulling down on the cap in the back. I am not sure how much of a problem this will be, but in the worst case the front of the cap can be drifting upward as the hair pulls on the cap in the back.
I’d be interested in collaborating with you to come up with the long hair version of the pattern, if you would like.
Thanks for the reply! I made a few and the main adjustment I made was extending the head piece about 18 inches down and creating a “pouch” I only did elastic where you originally had and after feedback from the nurses they would like the elastic to go all the way around the pouch.
Could you email me the pattern.
Thank you.
Hi, Corrine,
I’ve emailed you the PDF file. Did the download not work for you?
Do you have a pattern and PDF for the long hair pocket scrub cap?
I don’t, but Kylee above modified this to make a pouch for long hair. Perhaps post a comment in response to Kylee’s one.
I have made about 50 scrub caps using your pattern and love the 3 piece design which allows the use of different coordinating fabrics to use up scraps (for the band). The use of the French seam is great for a finished look and holds up through lots of washing. I chose to use 3 3/4″ of 3/8″ elastic, instead of 3″. I can get 2 complete caps out of 1/2 yard of 42″ wide fabric. Thanks for the great pattern.
Thanks for leaving a note, Anne, glad you liked the pattern!
your caps look very nice i love them could you please email me one .i work in a nursing home thank you very much.keep safe God bless
I am sorry – are you asking me to email you the pattern? Does the PDF download link above not work for you?
I do not have a computer. I don’t know how to use it. I’ll gladly pay for a pattern if you can mail it to my address. My address is 506 S. Main St., Donna, TX 78537. Thank you Mary Torres.
Can’t believe how easily this went together. Thanks so much! Scrub-a-dub-dub.
Stephanie, thank you so much for the comment and for the tip! Glad the pattern worked well for you!
How easy would it be to add a satin lining to this pattern?